Admin
Users & Call Controls
- Creating Extensions for Users
- Editing and Managing Extensions
- Creating Teams & Assigning Extensions
- Configuring Agent Status & BLF
- Managing Extension Schedules
- Managing User Roles
- Managing Call Controls
- Setting up Shared Parking
- Voicemails
- The BLF Function
- Configuring the Speed Dial
- Configuring the Busy Lamp Field (BLF)
Deployment Methods & System Requirements
Installation Guides
Activating AI Transcription
Introduction
This guide covers how to enable and configure AI-powered call transcription in RingQ. With transcription activated, RingQ automatically converts your voice calls into accurate, searchable text—making it easier to review conversations, maintain compliance, and gain insights from every interaction. Whether for training, quality control, or recordkeeping, AI transcription helps you get more value from your calls.
Enable AI Transcription
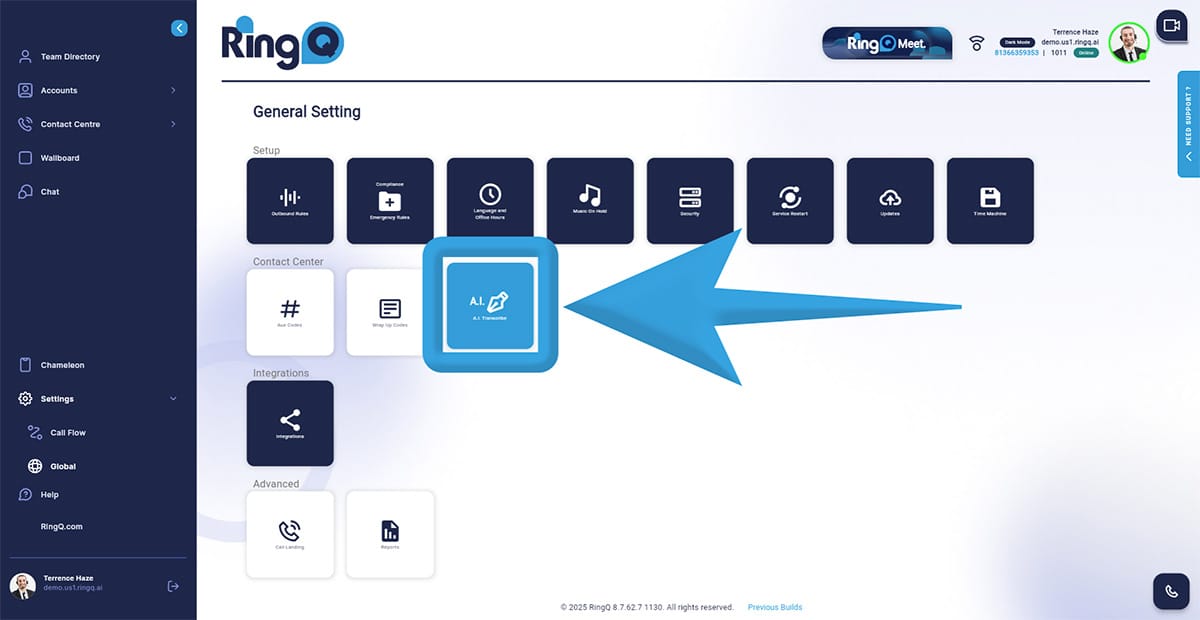
1. Login to your RingQ web app and go to “Settings” > “Global”.

2. Click on the AI Transcribe icon.
Toggle Enable Transcription to turn it on.
3. Click “Save”.
Testing the AI Transcription
1. Make a call
2. Complete the call
3. Access the Reports, go to “Settings” > “Global”.
4. In the Advanced section, click on the “Reports” icon.
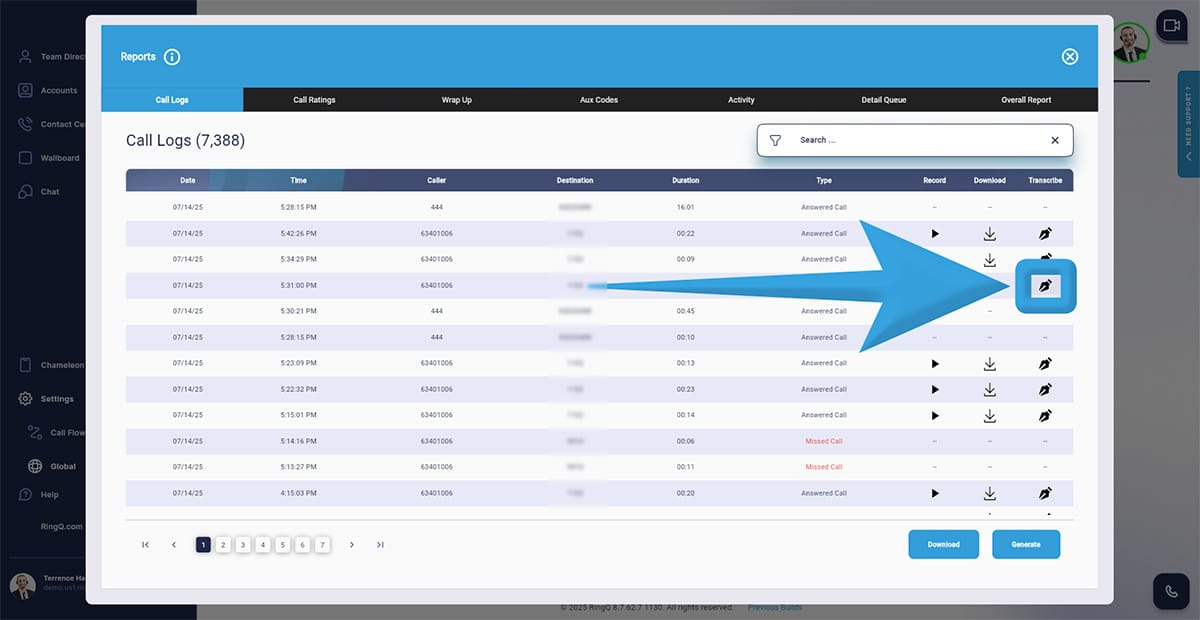
5. Open the specific call log – On the Reports page, locate the call you just made from the list of recent call logs.

6. View the transcription. Click the “Transcribe” action button next to the selected call.
7. Review the AI-generated transcription and summary of the call.
