Introduction
This document describes the configuration of WatchGuard firewall devices for use with the RingQ Phone System. This guide is based on Fireware XTM firmware version 12.9.2 or later and should be compatible with devices running this firmware.
Configure Port Forwarding (NAT)
1. First, Static NAT must be configured to forward incoming traffic from the static public IP address to the local IP address of the PBX. Navigate under Firebox® UI → Firewall → SNAT
2. Click the lock icon which will allow you to make changes and then click “Add”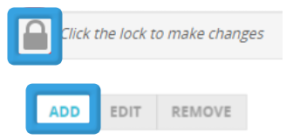
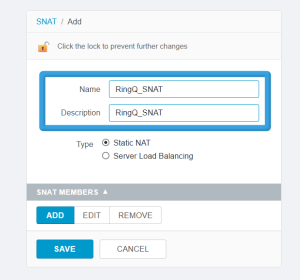
3. Enter the name “RingQ_SNAT” into the SNAT Policy.
4. Select “Static NAT” as the type.
5. Under “SNAT MEMBERS” click “Add”.
6. Select the IP address/interface under the drop-down menu. The external IP of the device should be used to NAT inbound traffic to the RingQ.
7. Enter the Internal/Private IP address of RingQ and click “OK”.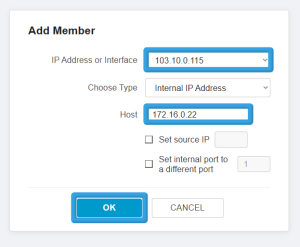
8. Click “Save” and the SNAT Policy is now active.
Create Firewall Policy
1. Navigate under Firebox® → Firewall → Firewall Policies and click “Add Policy”.
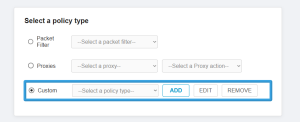
2. As a “Policy Type” select “Custom” and click “Add”.
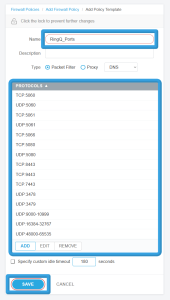
4. Fill in “RingQ_Ports” as the Name for the Policy Template.
5. Use the “Add” button below “PROTOCOLS” to add a custom list of ports which shall be allowed to connect to RingQ. When all ports have been added, click “Save”.
6. Click “ADD POLICY”
7. Fill in “RingQ_Services” as the Policy Name.
8. Remove the “From” and “To” objects.
9. Under the “From” section click “Add.”
10. Under the drop-down menu select “Any-External” and “OK.”
11. Under the “From” section click “Add.”
12. Under the drop down menu select “Any-External” and “OK.”
13. Save the Firewall Policy and the policy is now active.
NAT Loopback (Hairpin)
If you do not have an internal DNS server for Split DNS, you can use NAT loopback to allow internal devices to access the FQDN that resolves to the public IP address from within the internal network.
- In Step II.2 instead of adding a new custom policy, you should select the one already created, named “RingQ_Ports”
- In Step II.6 Use “RingQ_Services_Hairpin” as a name
- In Step II.7 do not remove the “FROM” object. Keep the “Any-Trusted” and/or add any other internal networks you want the NAT loopback (Hairpin) to apply to.
To Validate
1. Navigate under Firebox® UI → Firewall → SNAT to confirm you have a SNAT Policy so traffic can reach the RingQ server.
2. Navigate under Firebox® → Firewall → Firewall Policies to see the overview of your configuration. Click on the RingQ policy name (i.e. “RingQ_Ports”) to confirm all of the specific configurations are in place.
See Also
- Configuring a Cisco Router with RingQ
- Configuring a Draytek Firewall with RingQ
- Configuring a pfSense Firewall with RingQ
- Configuring a Sonicwall with RingQ