Introduction
This guide explains the main buttons and controls available in RingQ Meet. Understanding these buttons helps you navigate the interface and use features such as audio, video, screen sharing, and participant controls during a meeting.
RingQ Meet Buttons

- Join with an ID: Allows users to join a meeting by entering a meeting ID provided by the host.
- Meet Now: Instantly start a new meeting without requiring a scheduled time or ID.
- Scheduled Meeting: Provides access to a meeting that has been scheduled in advance by the host.
Pre-Meeting Options
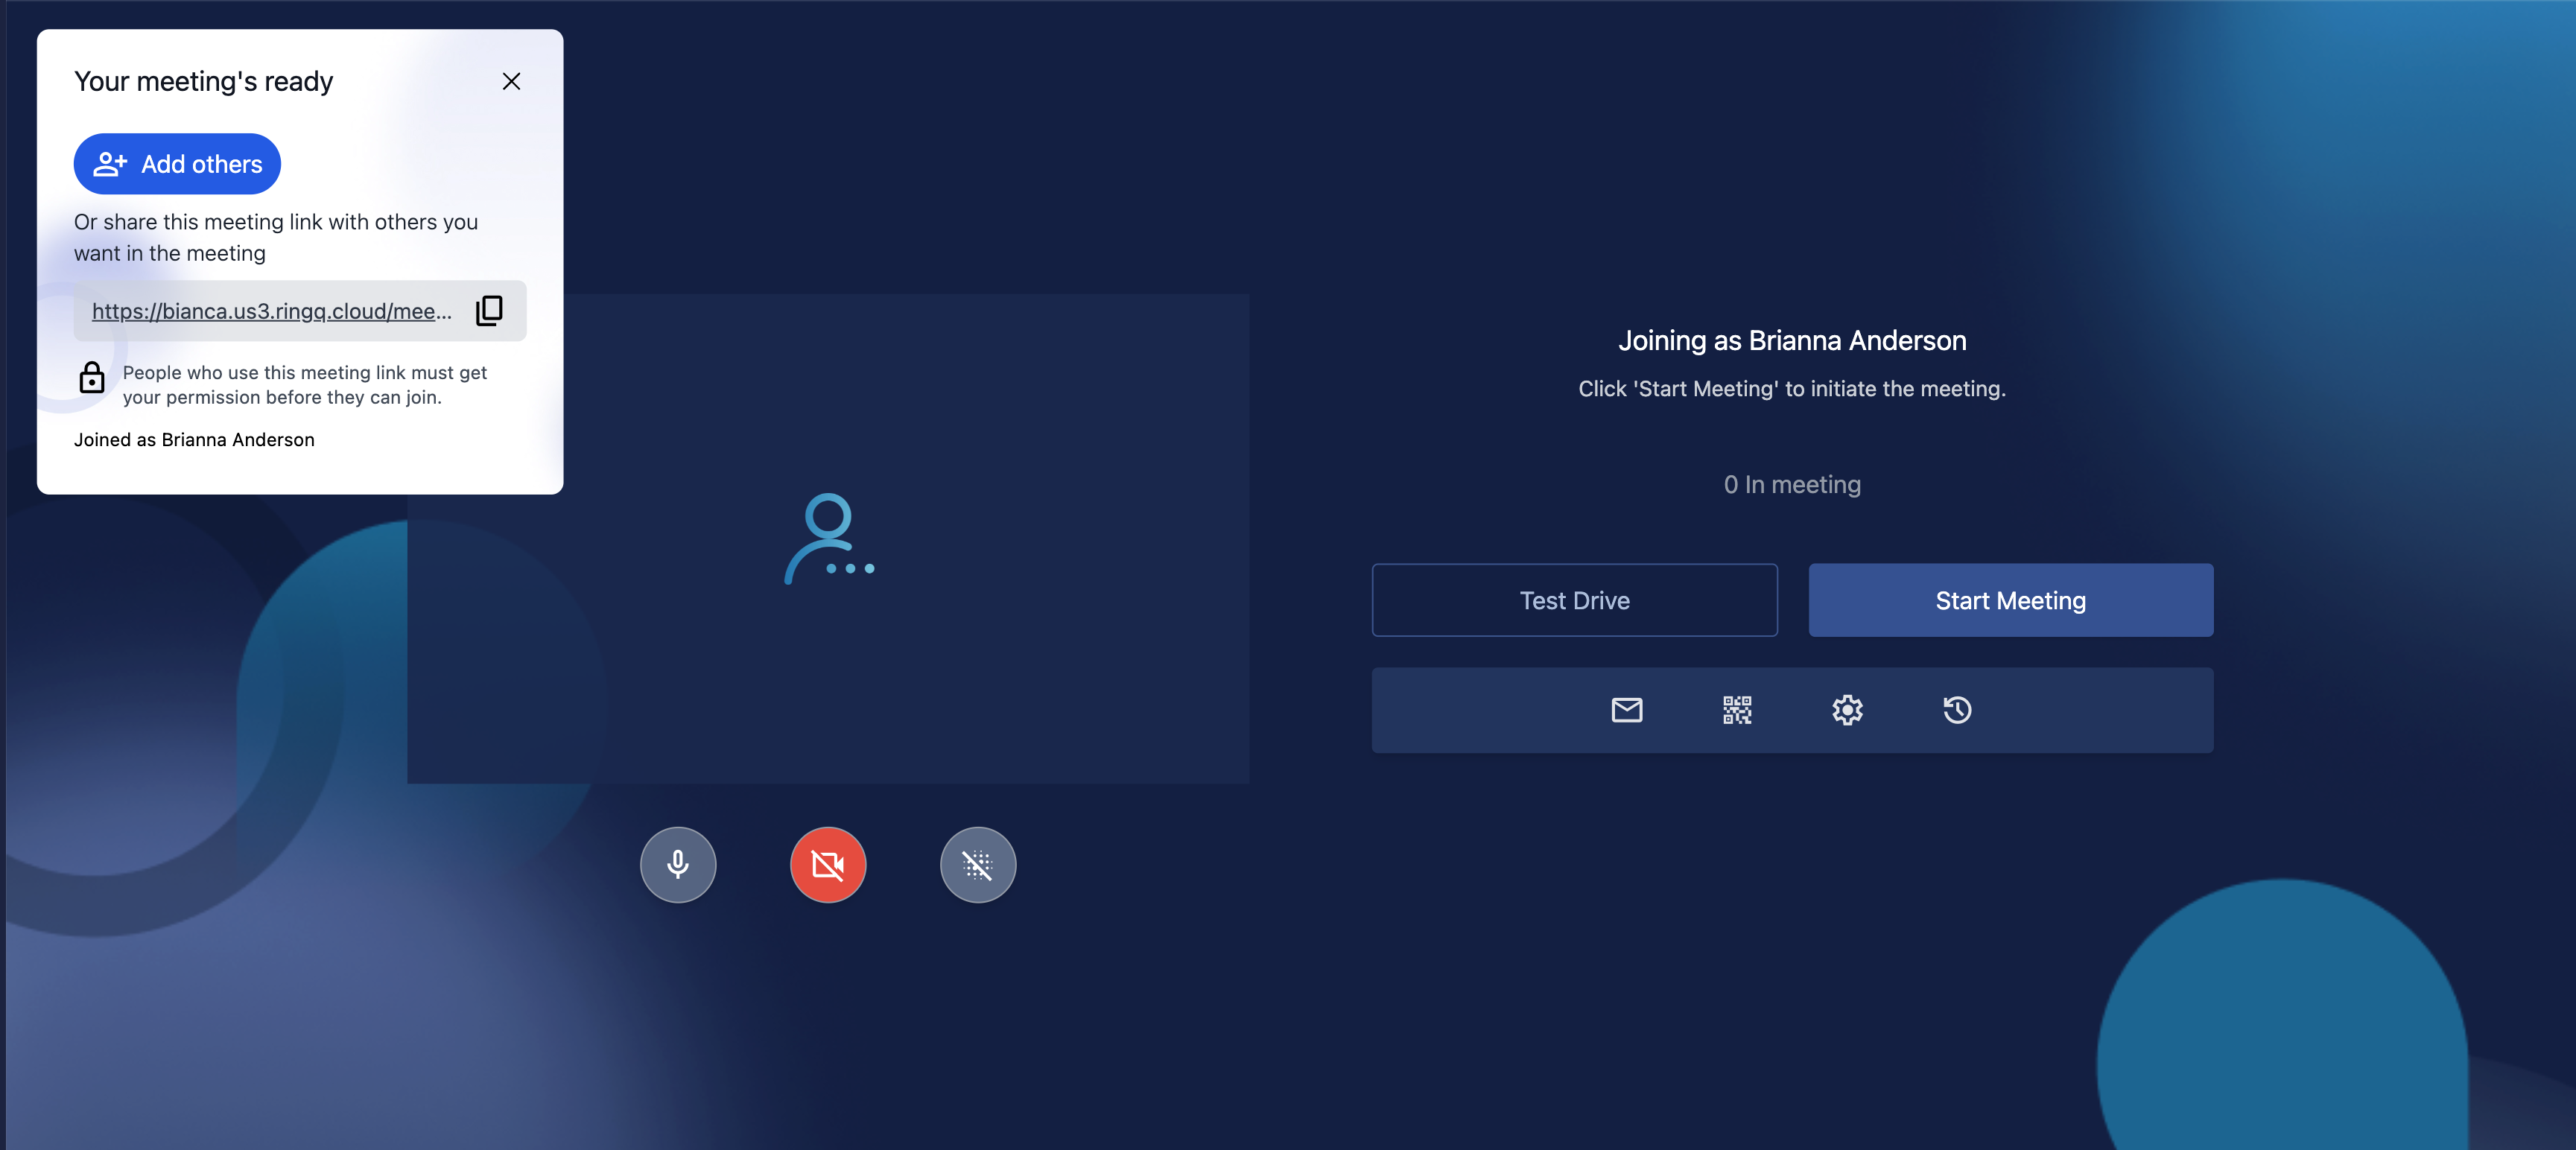
- Turn Mic ON/OFF: Enables or disables the user’s microphone before entering the meeting.
- Turn Camera ON/OFF: Toggles the user’s camera on or off before entering the meeting.
- Blur ON/OFF: Enables or disables background blur during the meeting.
- Test Drive: Allows users to check their audio and video settings before starting or joining a meeting. It also allows users to check their internet connection.
- Start Meeting: Initiates the meeting for the host or presenter.
- Invite Participants: Provides options to invite others via email, link sharing, or other methods.
- QR Code: Generates a QR code that participants can scan to join the meeting quickly.
- Settings: Accesses and adjusts various meeting settings such as audio, video, and notifications.
- History: Displays the user’s meeting history and past meetings attended or hosted.
In-Meeting Options

- Turn Mic ON/OFF: Allows participants to mute or unmute their microphone during the meeting.
- Turn Camera ON/OFF: Enables or disables the participant’s camera during the meeting.
- Share Screen: Allows participants to share their screen with others in the meeting.
- Raise Hand: Signals to the host or presenter that a participant has a question or comment.
- Thumbs Up: Provides a non-verbal way for participants to express agreement or approval.
- More Options: Expands to reveal additional meeting options such as copying joining information, inviting participants, test drive and accessing further settings.
- Leave Meet: Allows a participant to leave the meeting.
- AI Listener: Utilizes AI to transcribe and interpret spoken language for accessibility or note-taking.
- Meeting Details: Displays information about the meeting, including time, date, and participants.
- Participants: Lists all participants currently in the meeting and their roles.
- White Board: Opens a digital whiteboard for collaborative drawing or note-taking during the meeting.
- Chat: Opens a chat window for text-based communication between participants.