Introduction
This guide explains how to configure LINE Chat in the RingQ Web App. By following the steps, you can integrate LINE messaging with RingQ and enable the platform to send and receive chat messages.
LINE Prerequisites
- Administrator access to the RingQ Web App.
- Active LINE Developer account.
- Access to the LINE Developers Console.
- Created a LINE Messaging API Channel.
- Channel Access Token (long-lived token) generated from the LINE Developers Console.
- You have your Channel ID and Channel Secret available.
- Your LINE channel is properly configured for Messaging API usage.
- You have enabled Webhook in the LINE Developers Console.
- Your LINE account can complete any required verification or security checks.
Access Chat Channel Settings
1. Sign into your RingQ Admin dashboard.
2. From the main menu, go to Settings.
3. Select Global Settings.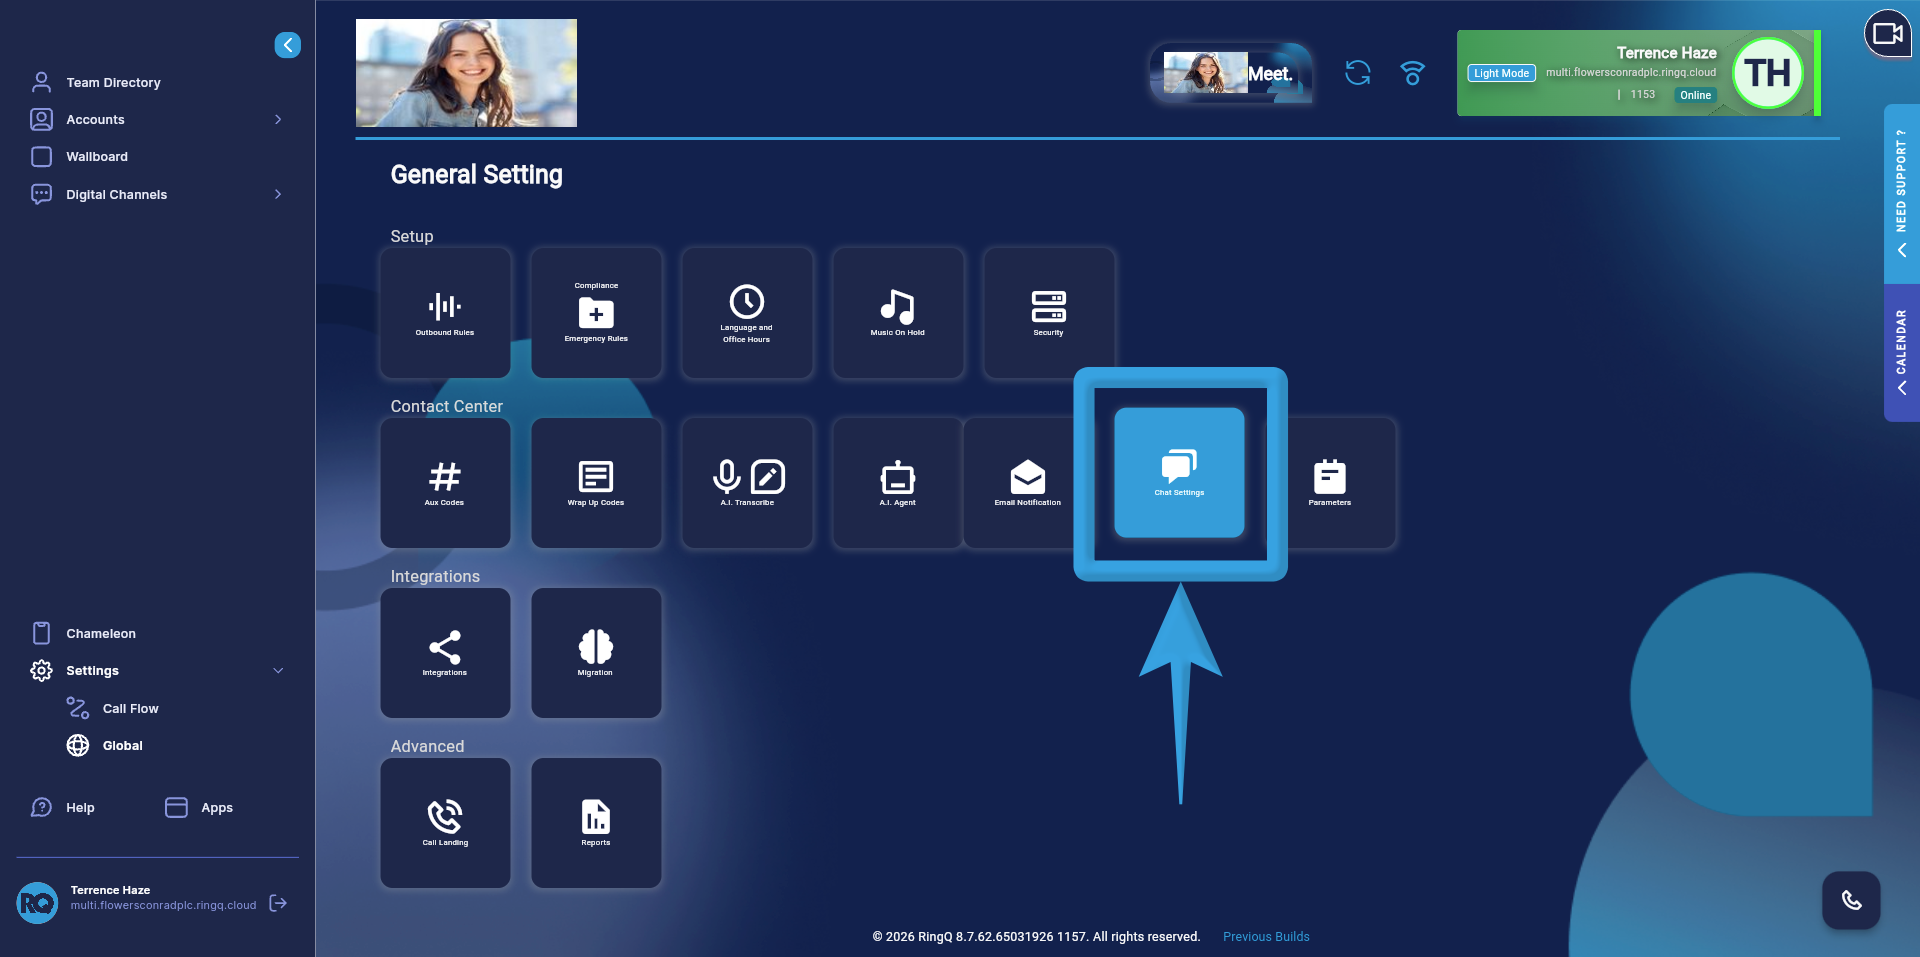
4. Click on ‘Chat Settings’.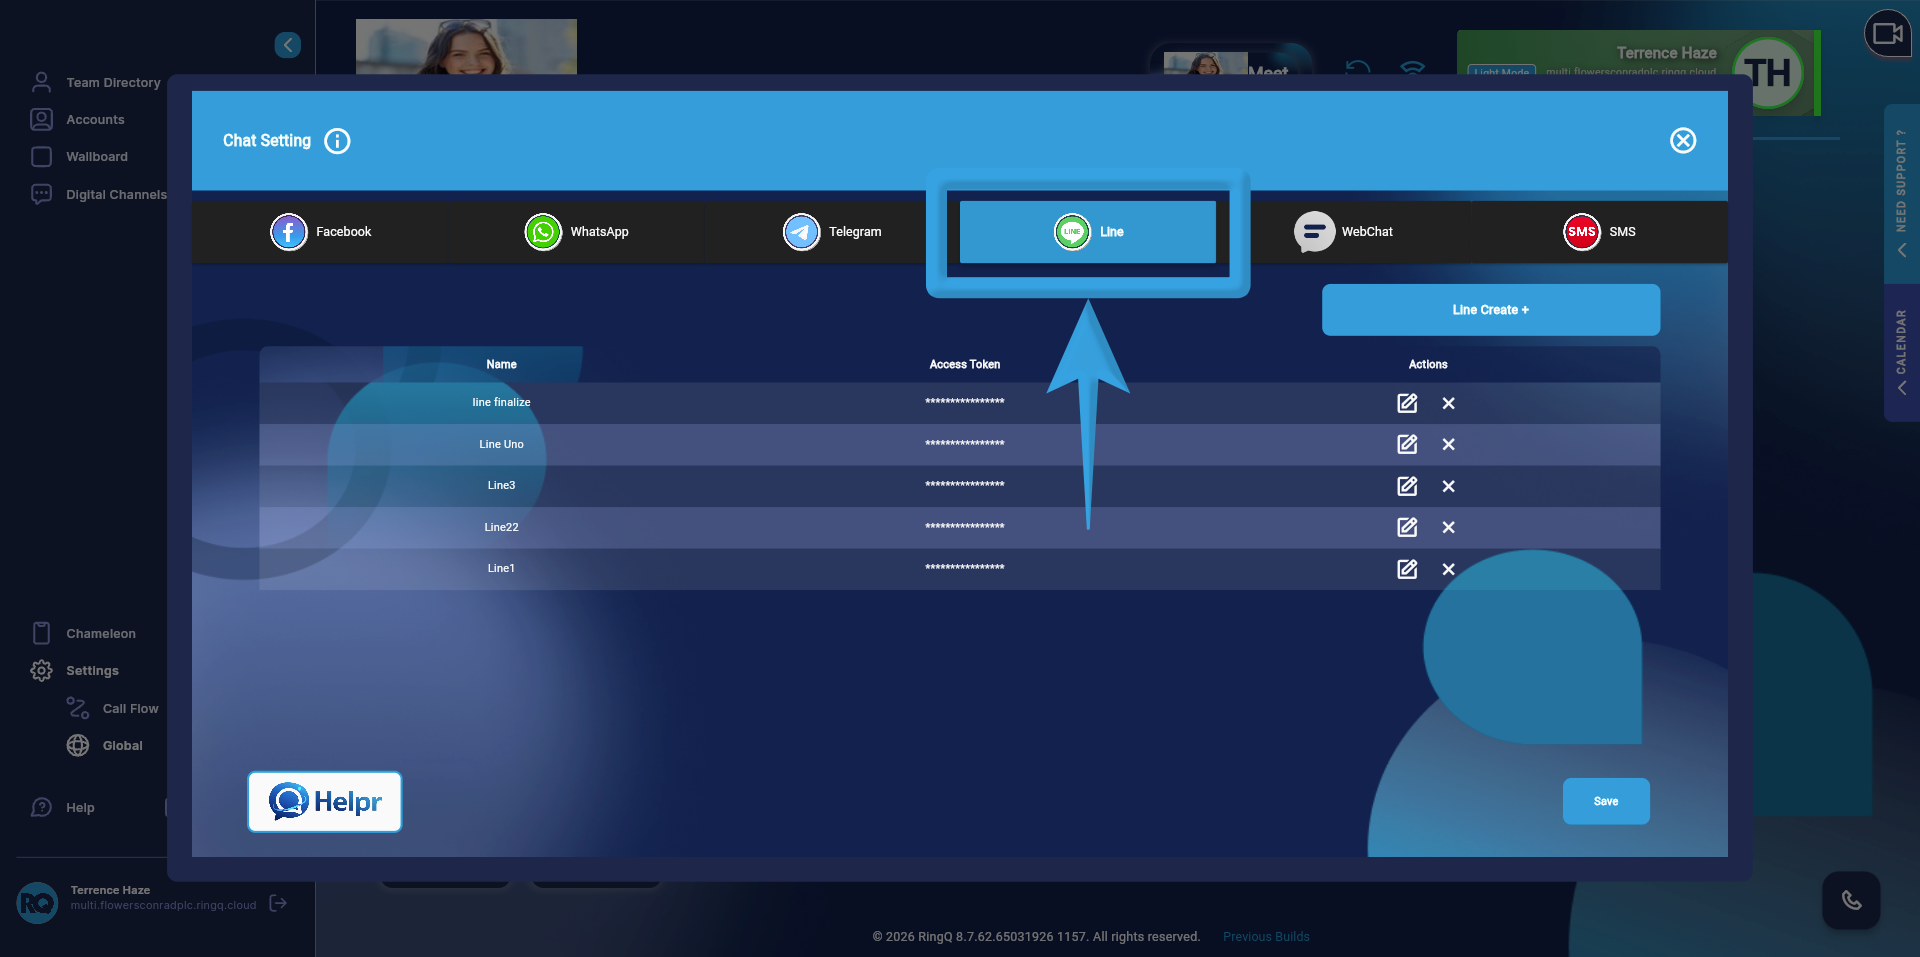
5. In the Chat Settings page, locate the list of available chat channels. Select Line to begin the configuration process.
Configure LINE Chat
Before starting the configuration, collect all required values from your LINE Developers Console.
Using a note-taking app or any text editor, list and save all configuration details. This will allow you to quickly copy and paste the values during setup without switching between multiple screens.
Proceed by following the LINE Developers setup guide to ensure that all credentials are properly generated and configured.
Links will be provided once the guides are completed for the following:
- Configuring Settings on the LINE Platform Side
- Setting Up Inbound Configuration in the Call Queue
Add LINE Account Info in the RingQ Web App
Once all required information has been collected, carefully copy and paste each value into its corresponding field in the RingQ Web App.
- Ensure each value is accurate and correctly matched to its field.
- Complete the configuration one field at a time to avoid errors
- Double-check all entries before saving
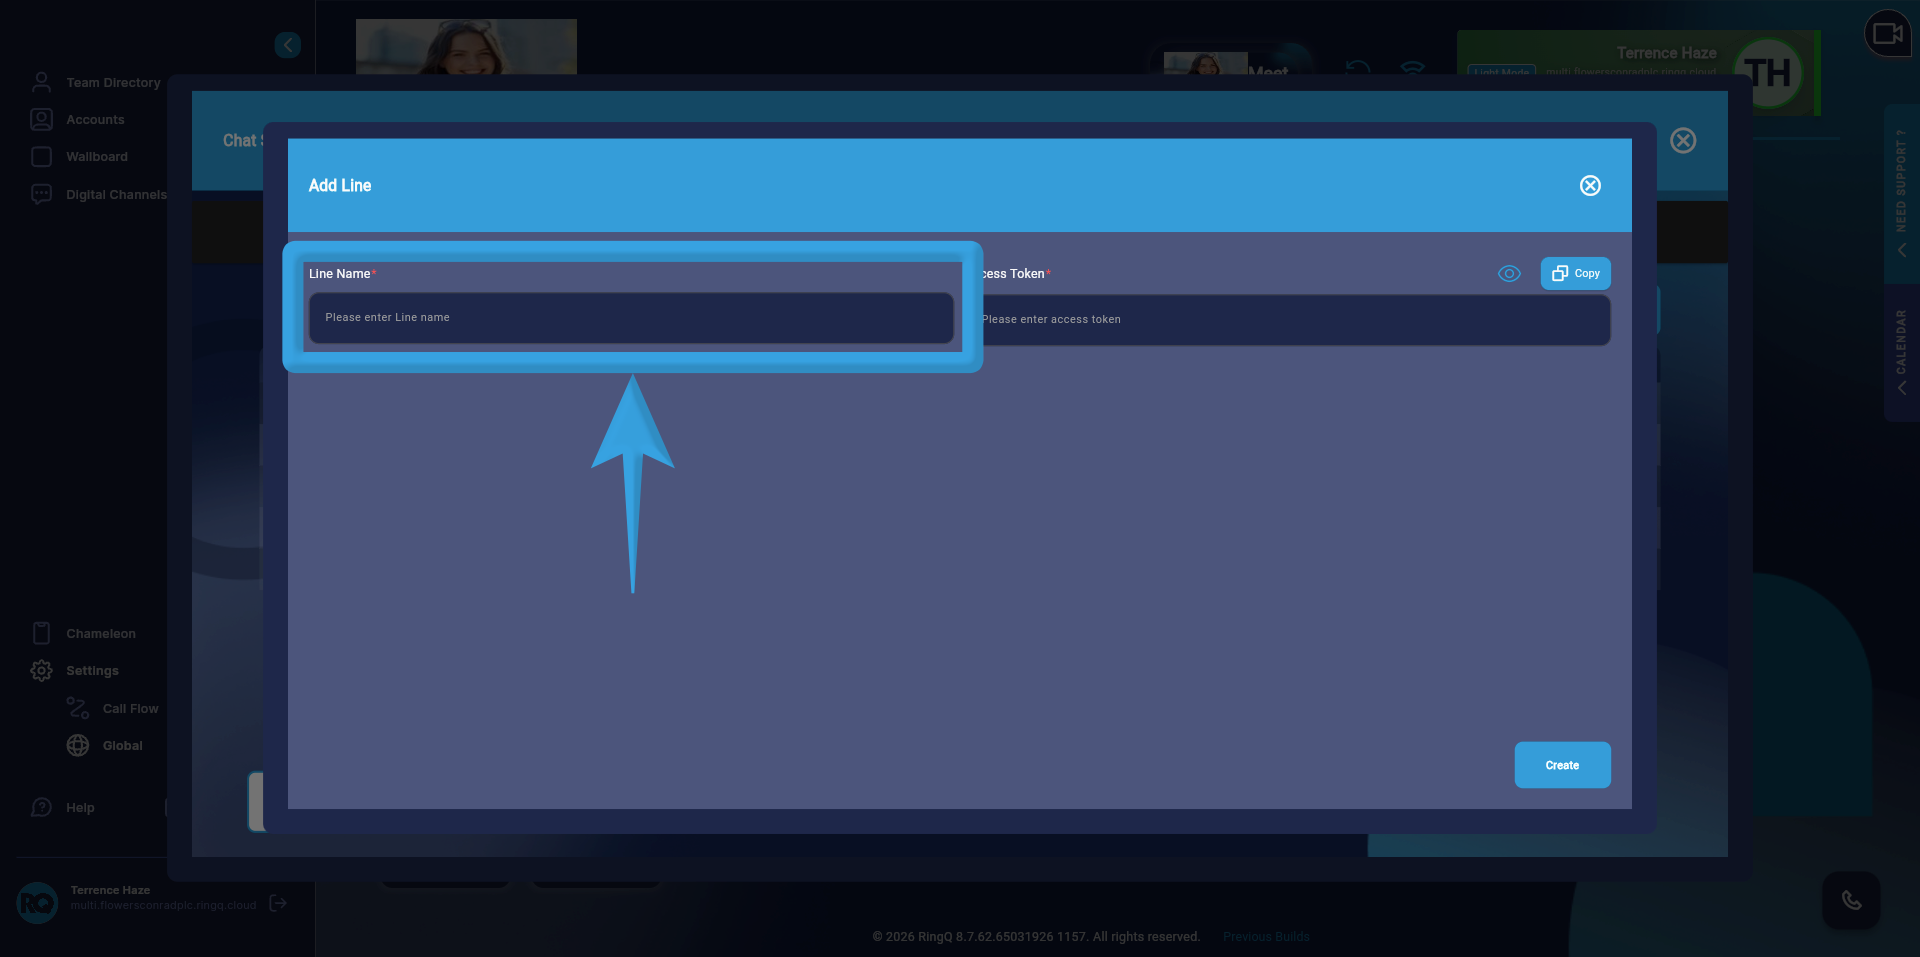
1. Enter a descriptive name for the integration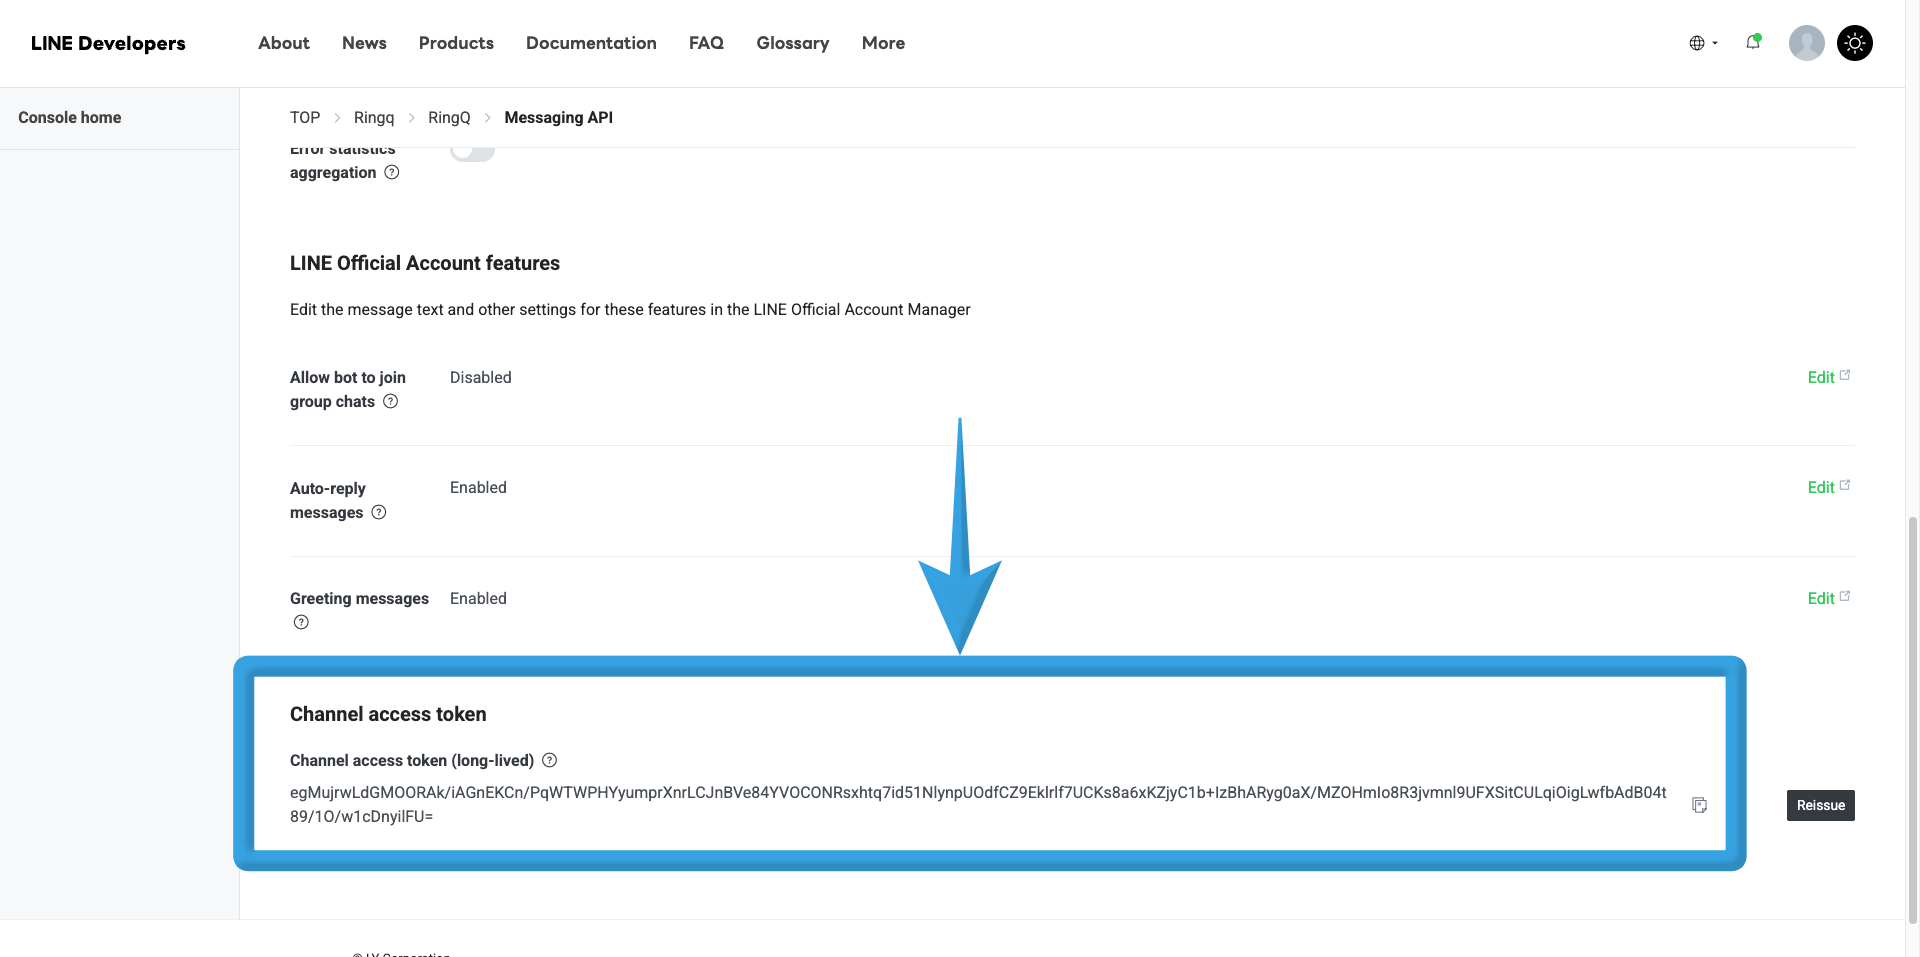
2. Copy the Channel Access Token from your LINE configuration details.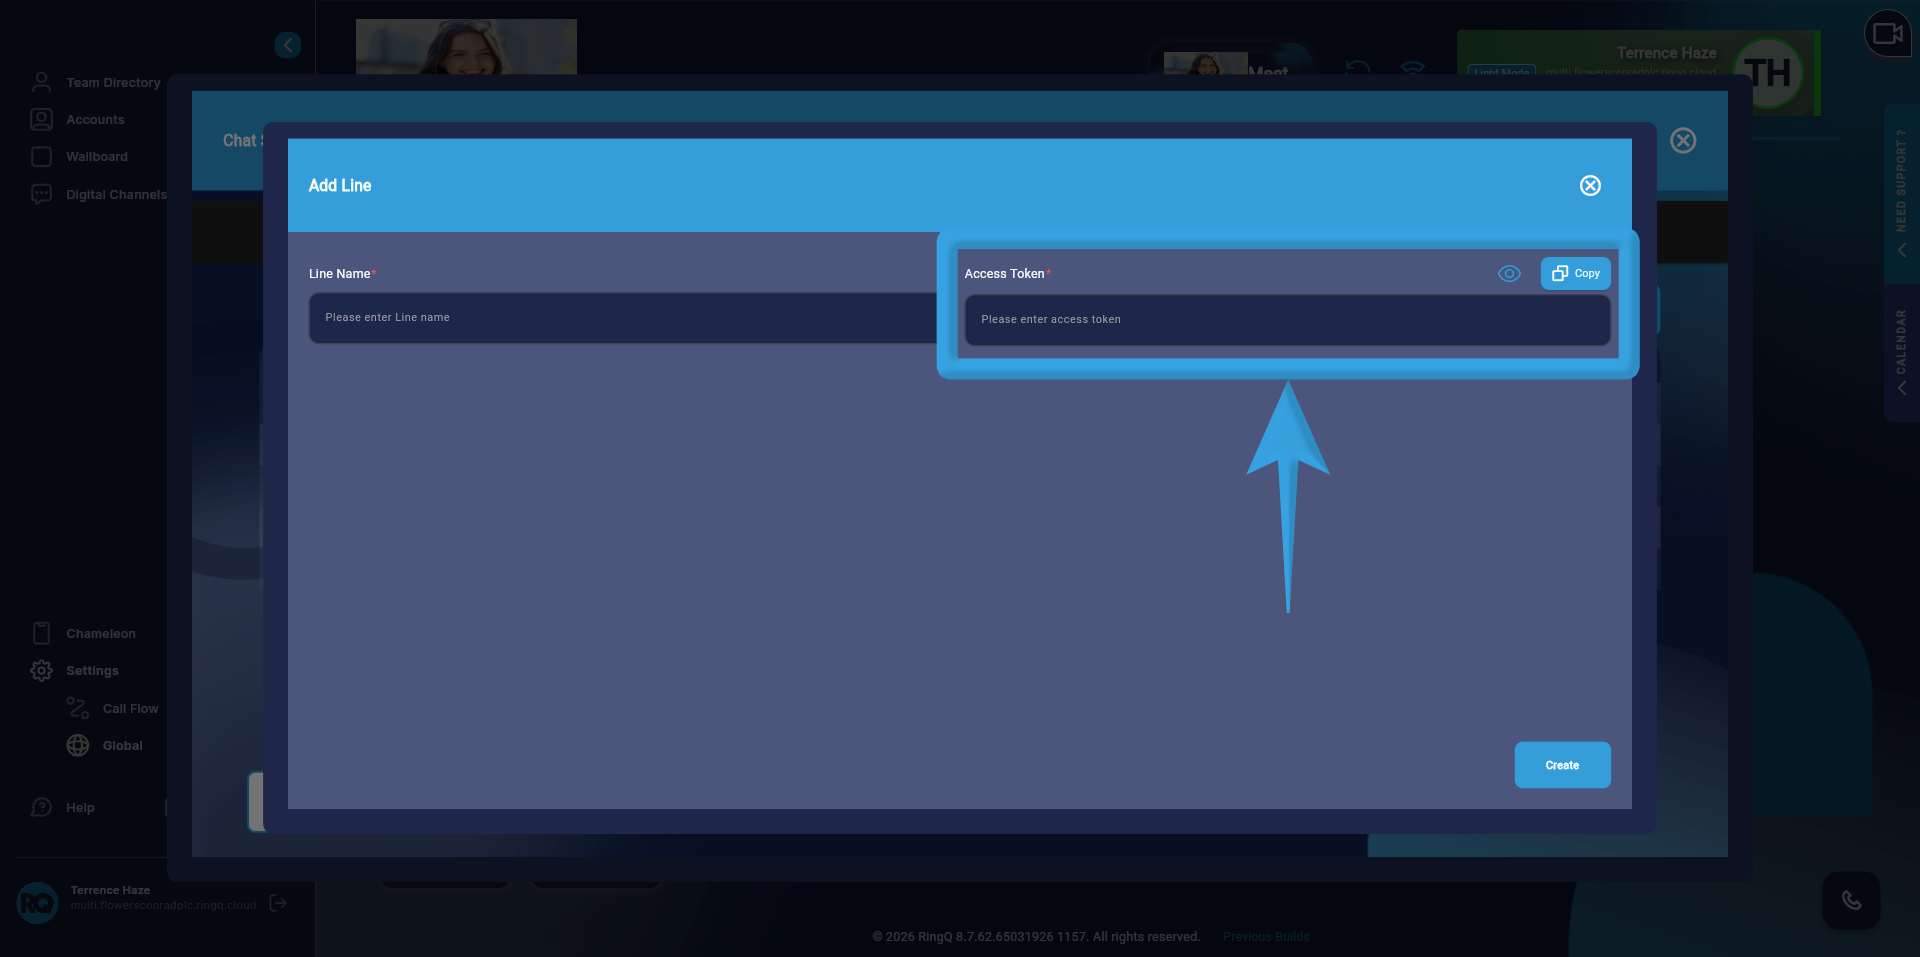
3. Paste it into the Access Token field in the RingQ Web App.The Channel Access Token is used to authenticate and securely connect RingQ to your LINE Official Account, enabling message sending and receiving.
4. Click ‘Create’.
Important Notes
- Ensure that all values are copied correctly from the LINE Developers Console.
- Do not interchange fields (e.g., Access Token should only be placed in the Access Token field).
- Make sure the Channel Access Token is active and not expired.