Introduction
This guide explains how to obtain the required configuration details for integrating Facebook Chat with RingQ. These details are needed to connect your Facebook Business Page with RingQ, allowing your team to manage and respond to Facebook messages directly from the RingQ Web App.
Access the Messenger API Settings
1. Log in to your Meta Developers dashboard – follow this guide.
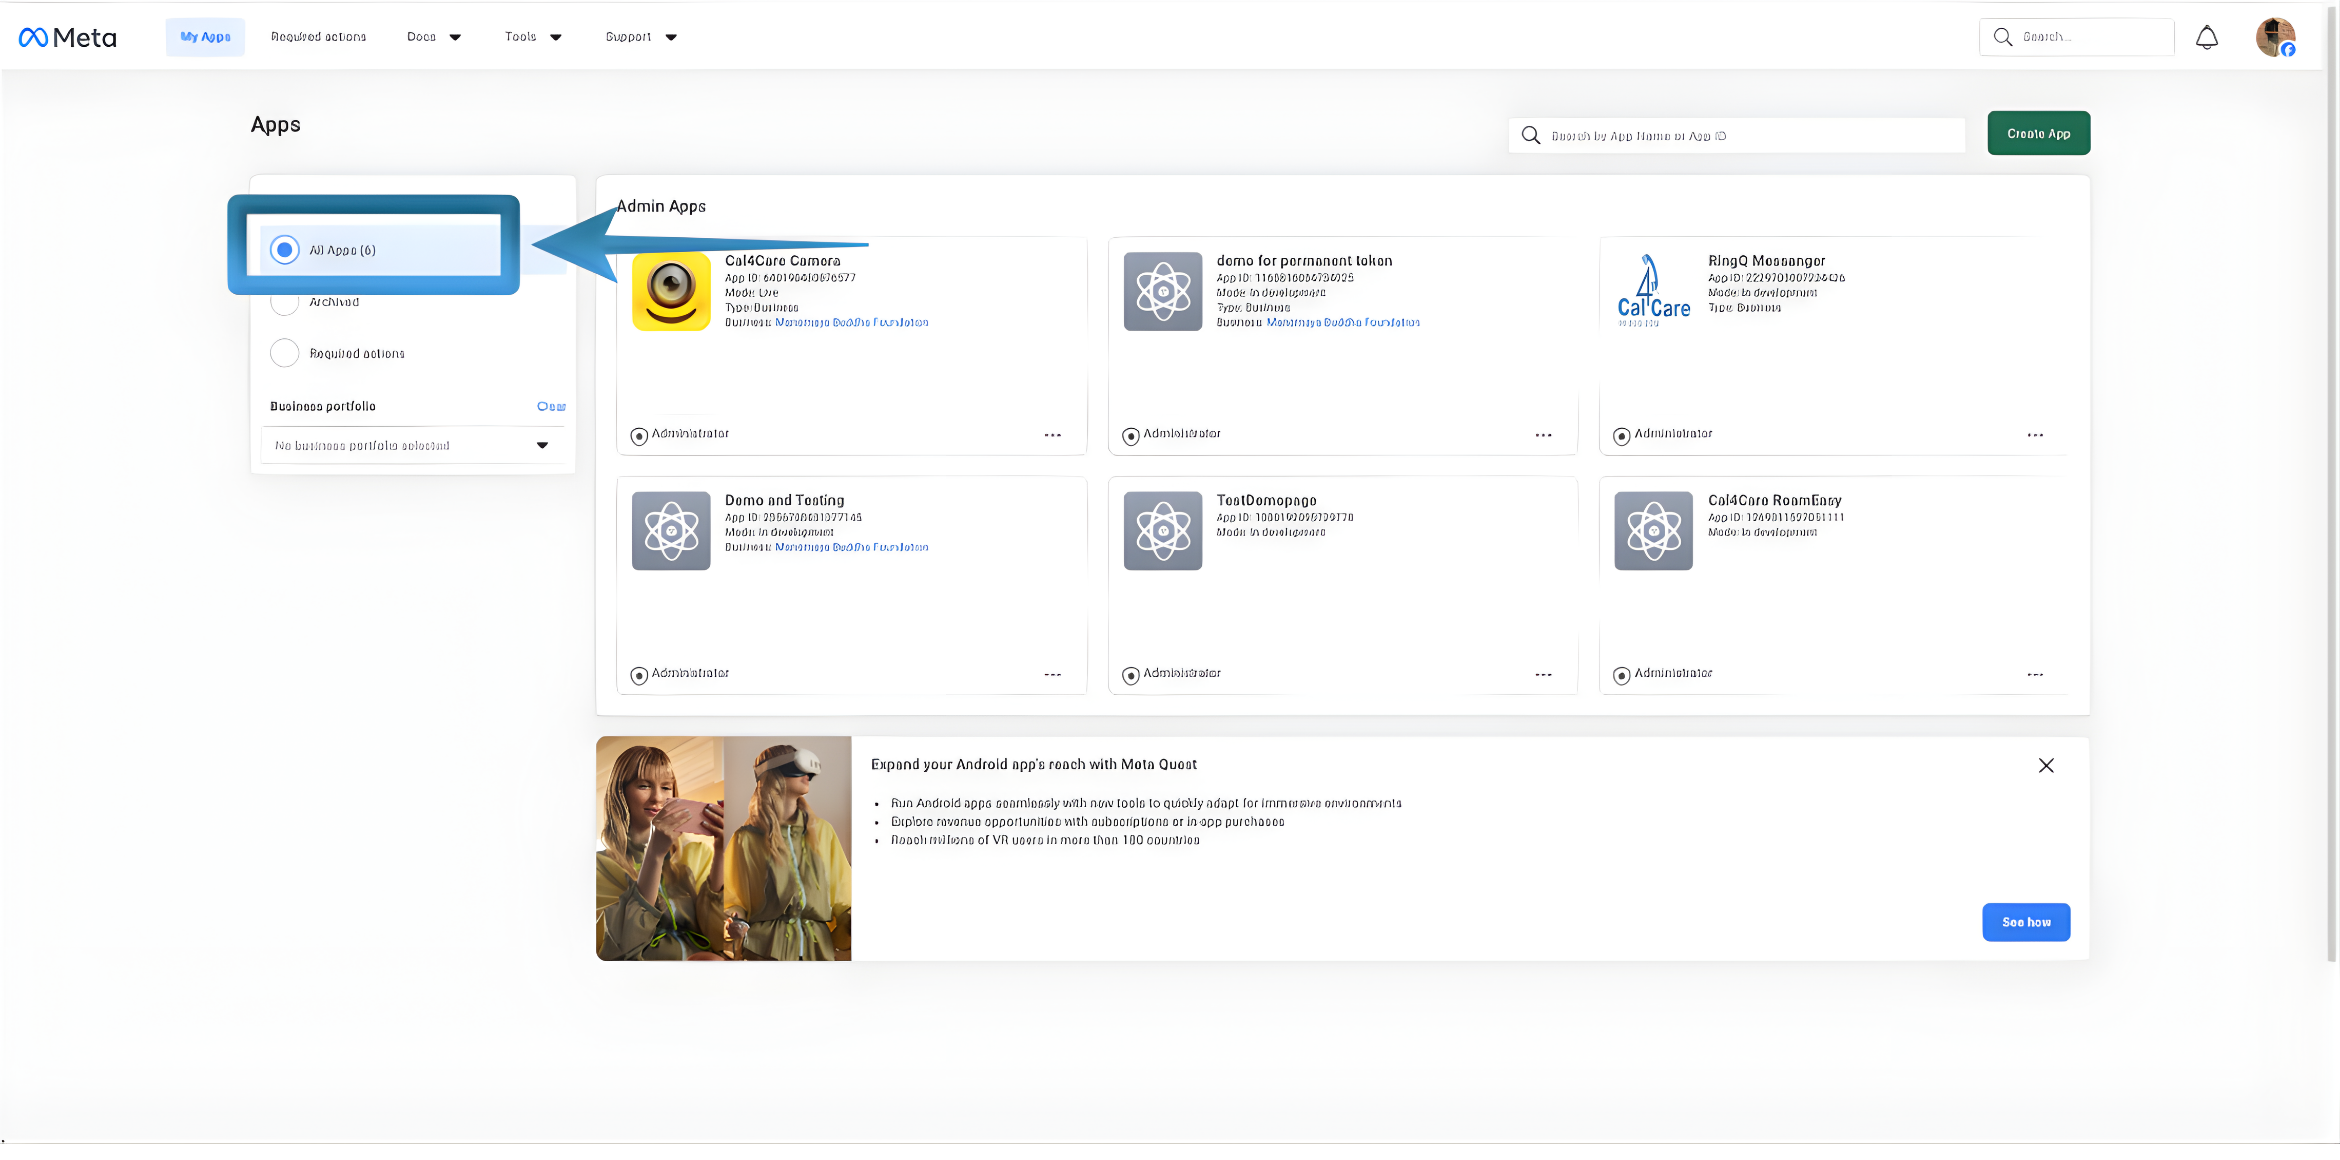
2. From the dashboard, select All Apps.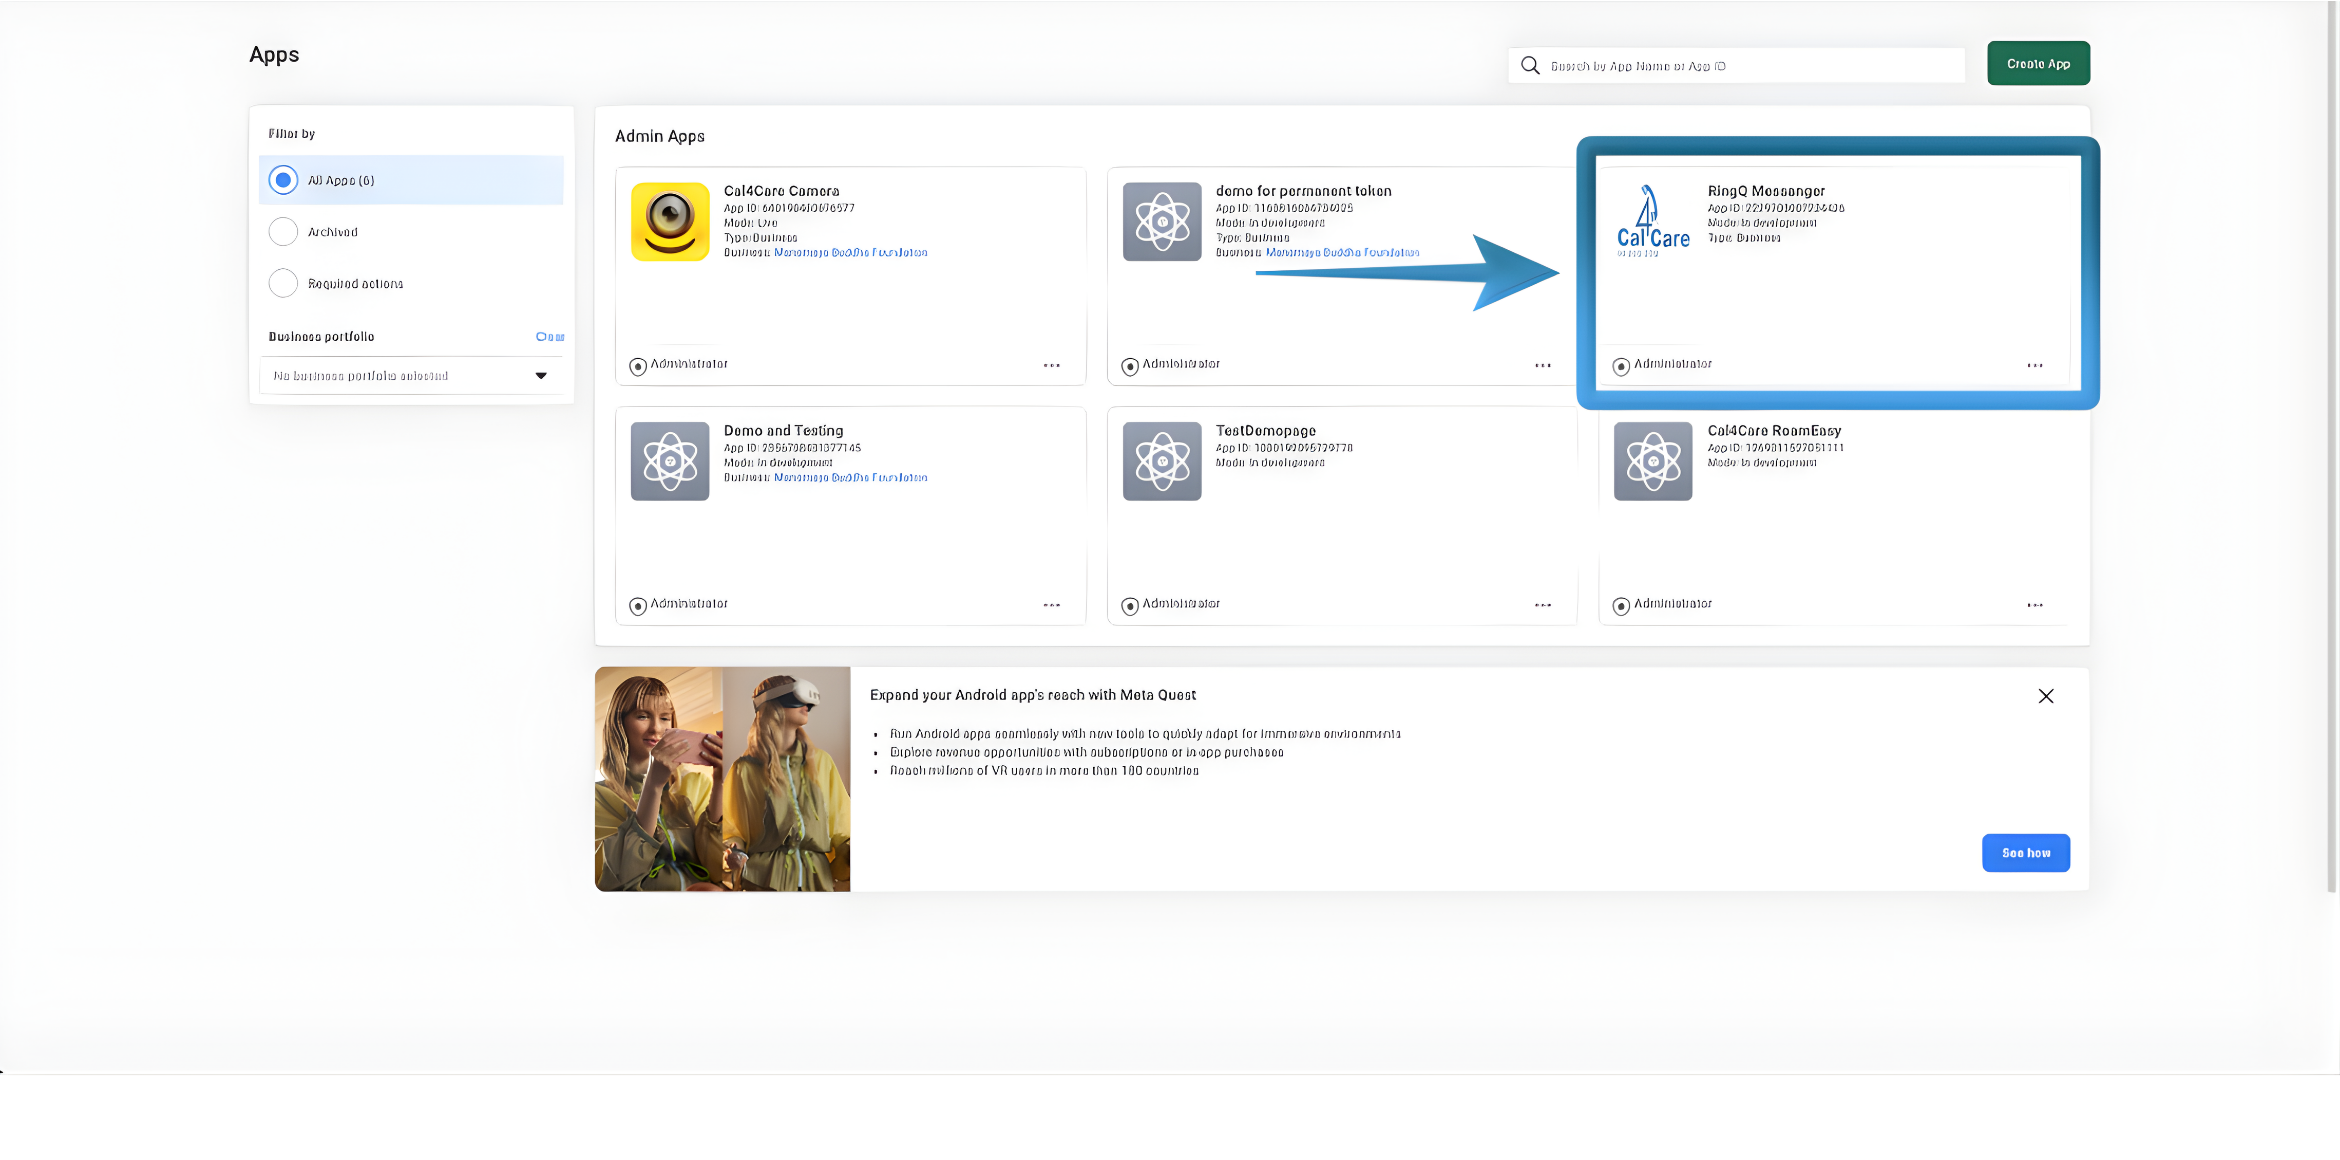
3. Choose the app you want to configure (for example, an app created for generating a permanent token). 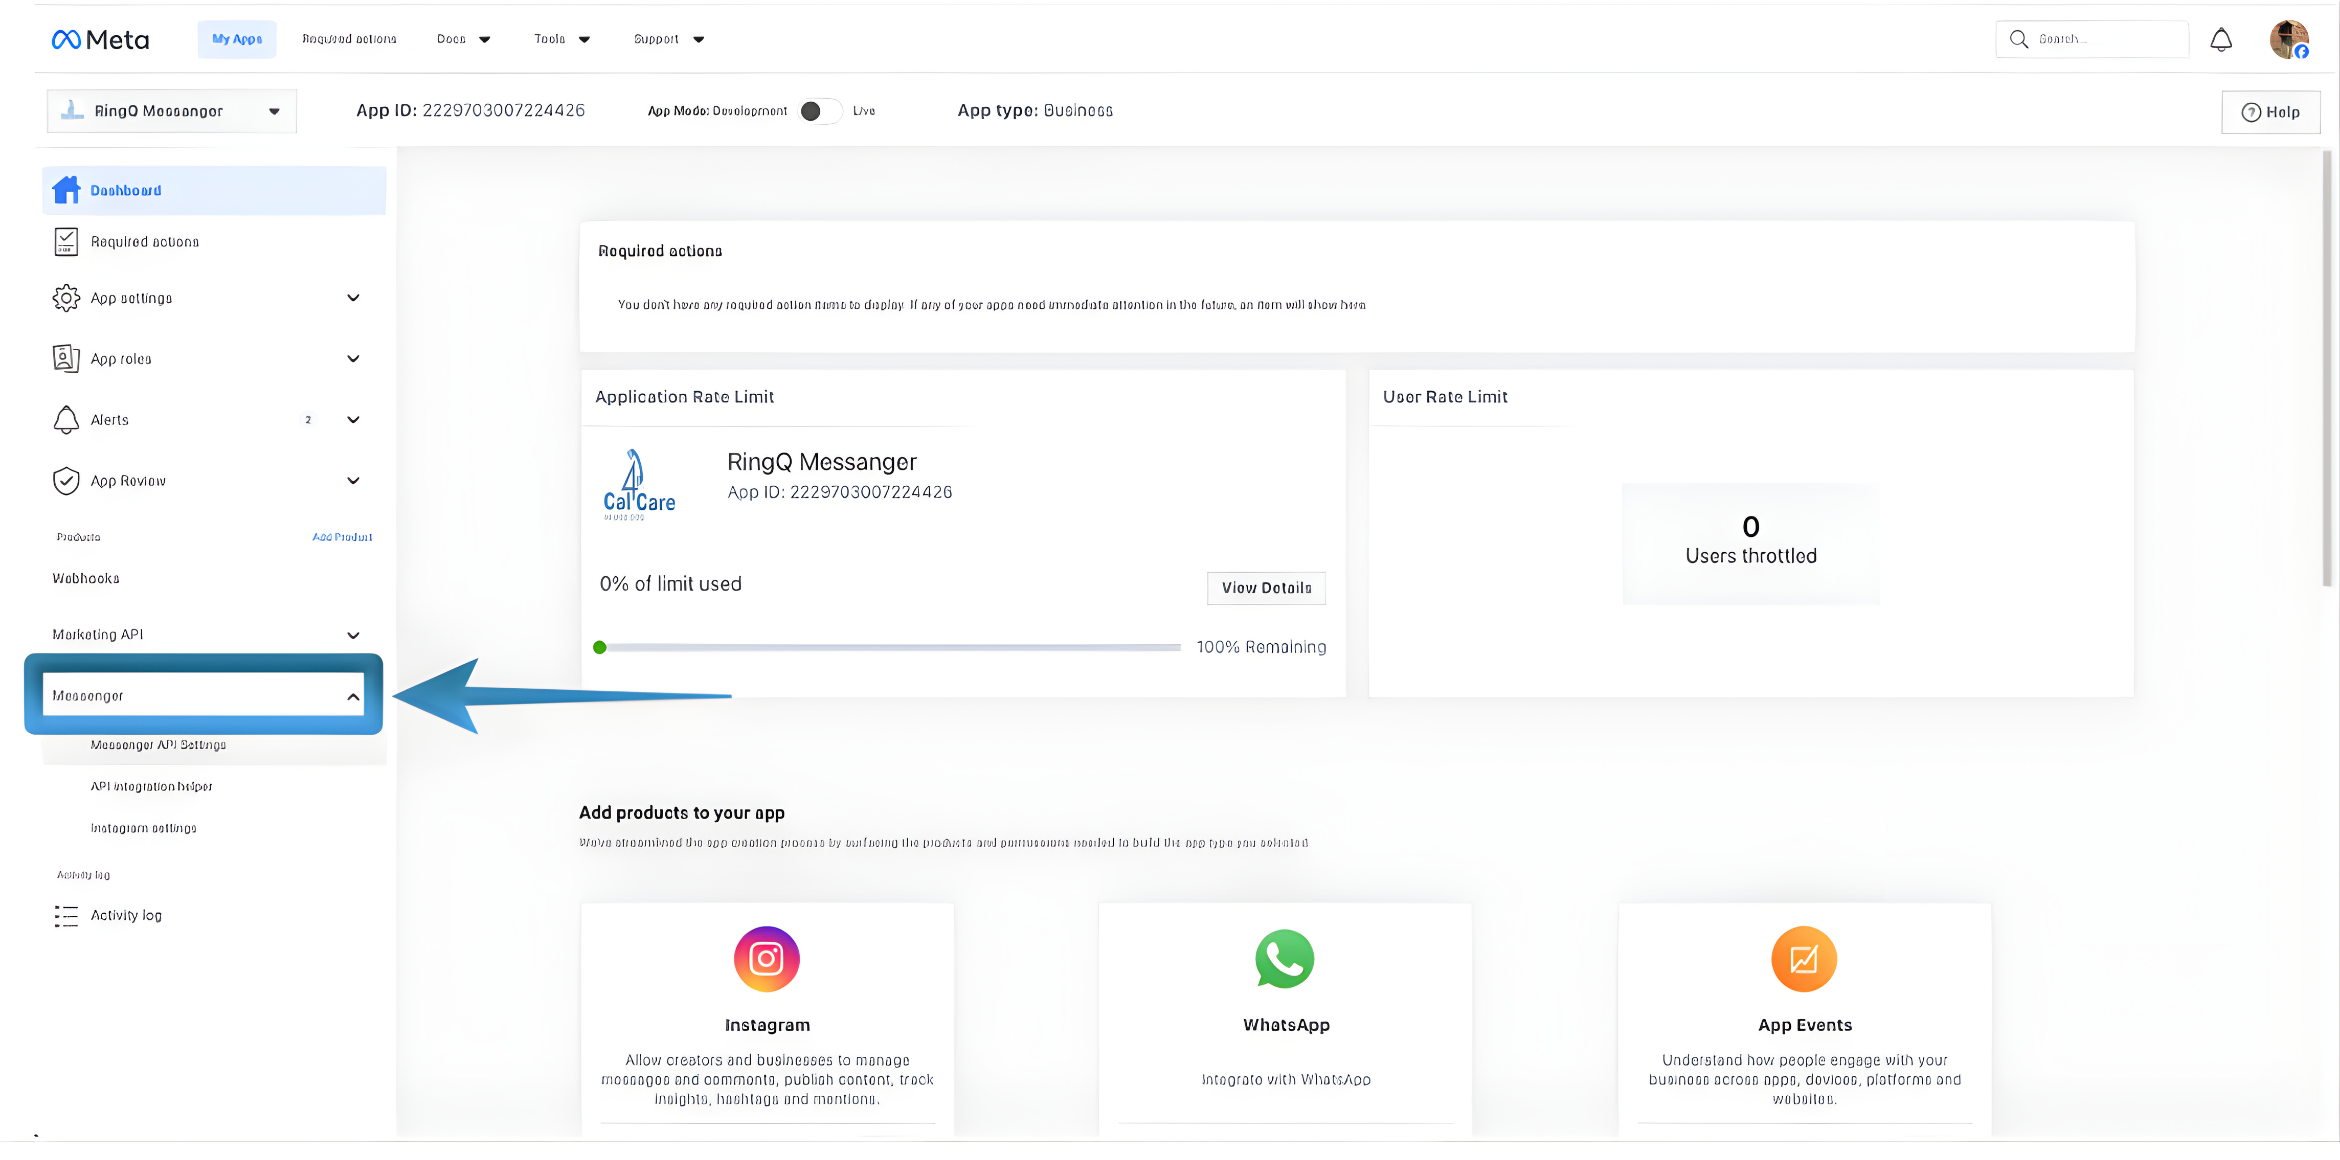
4. In the left sidebar, expand Messenger using the dropdown menu. 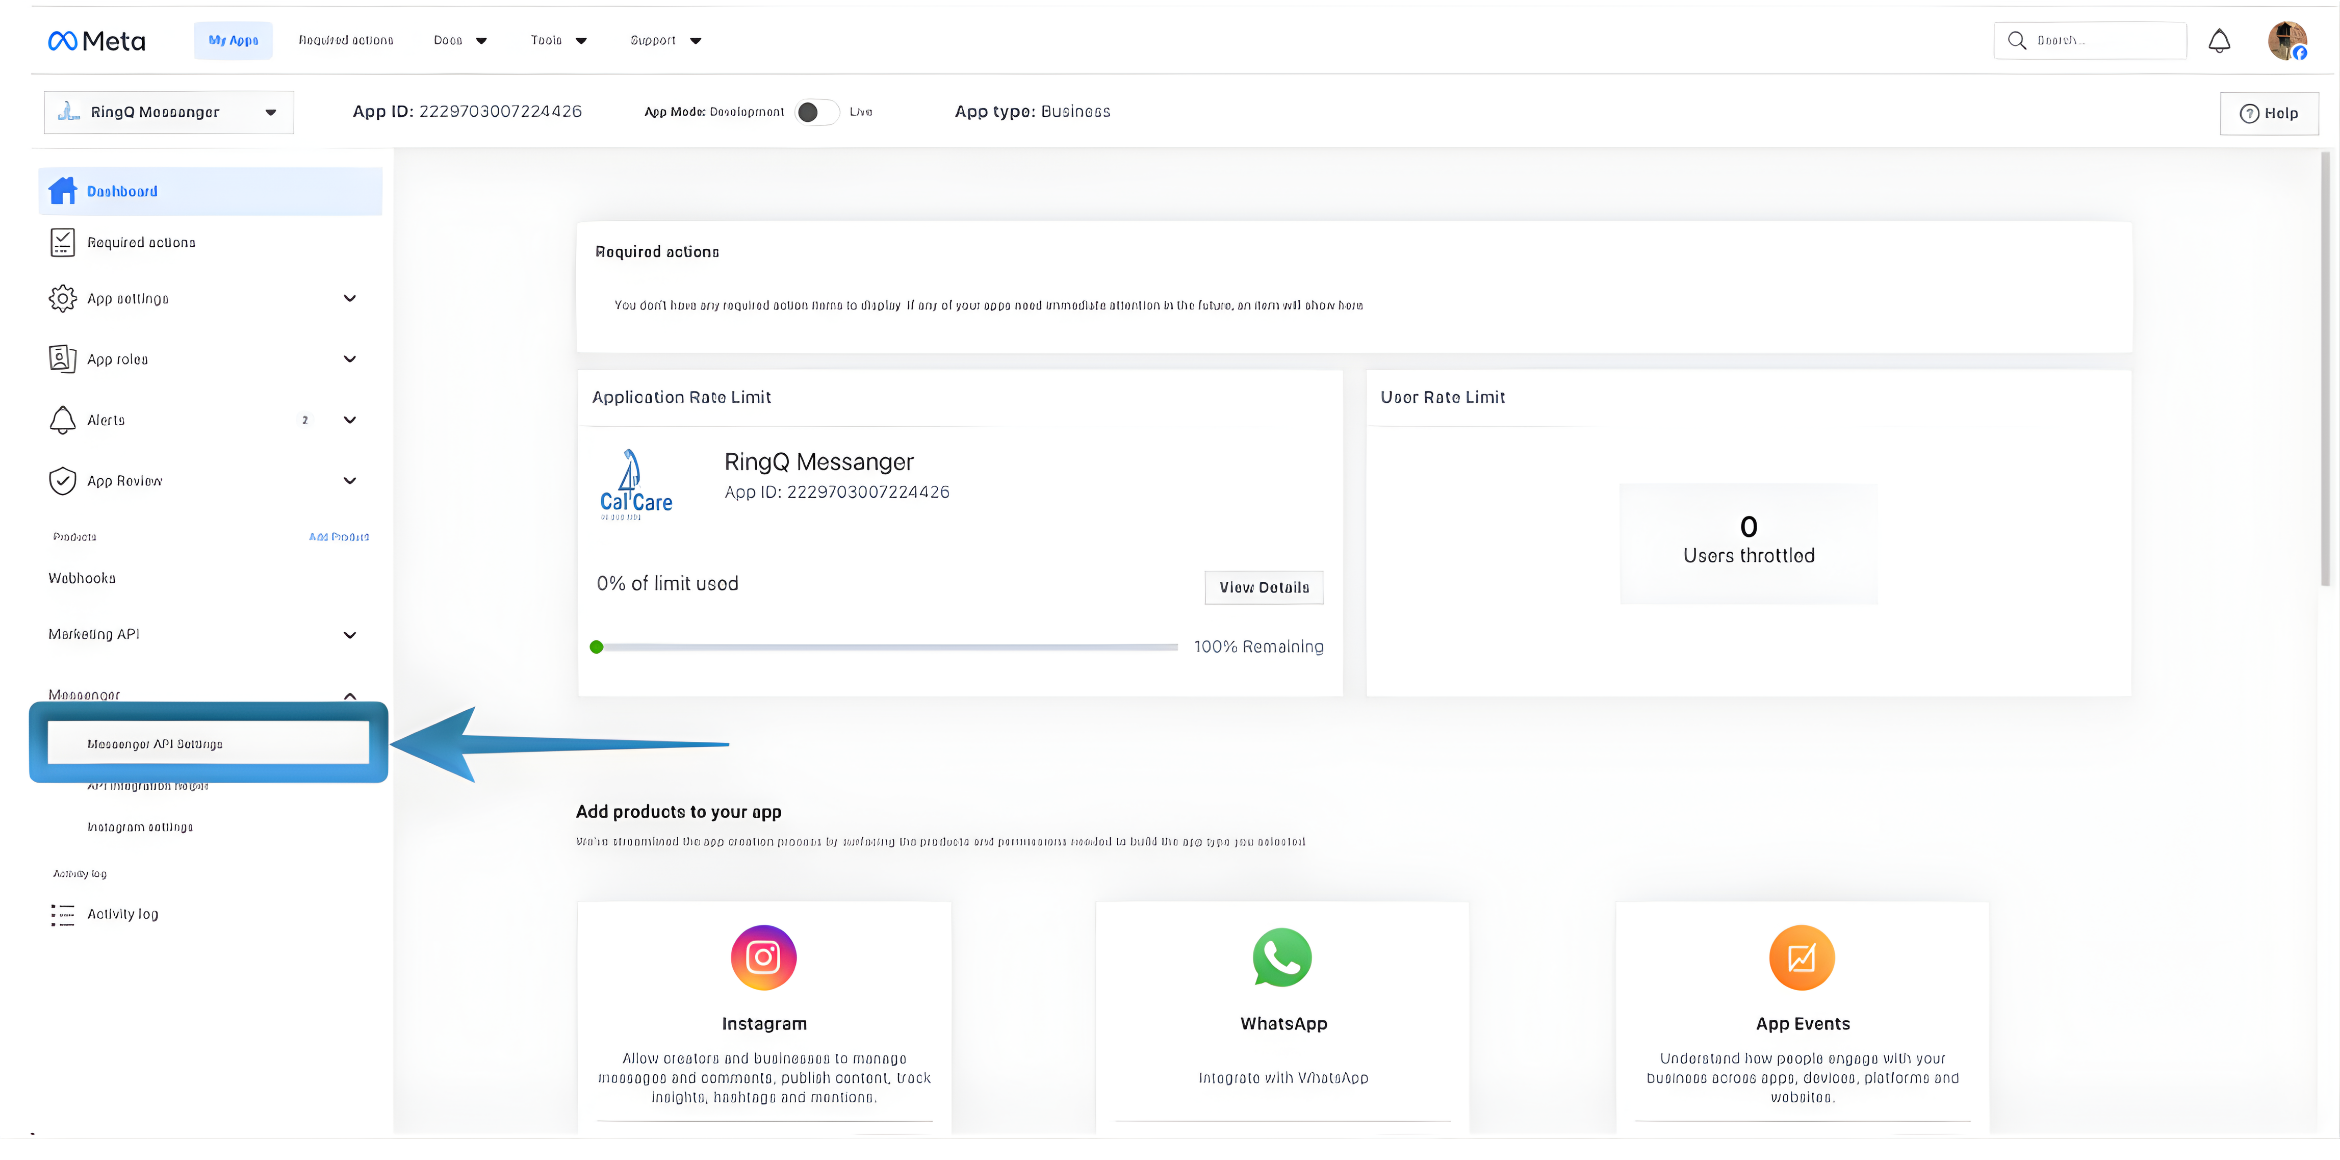
5. Click Messenger API Settings. 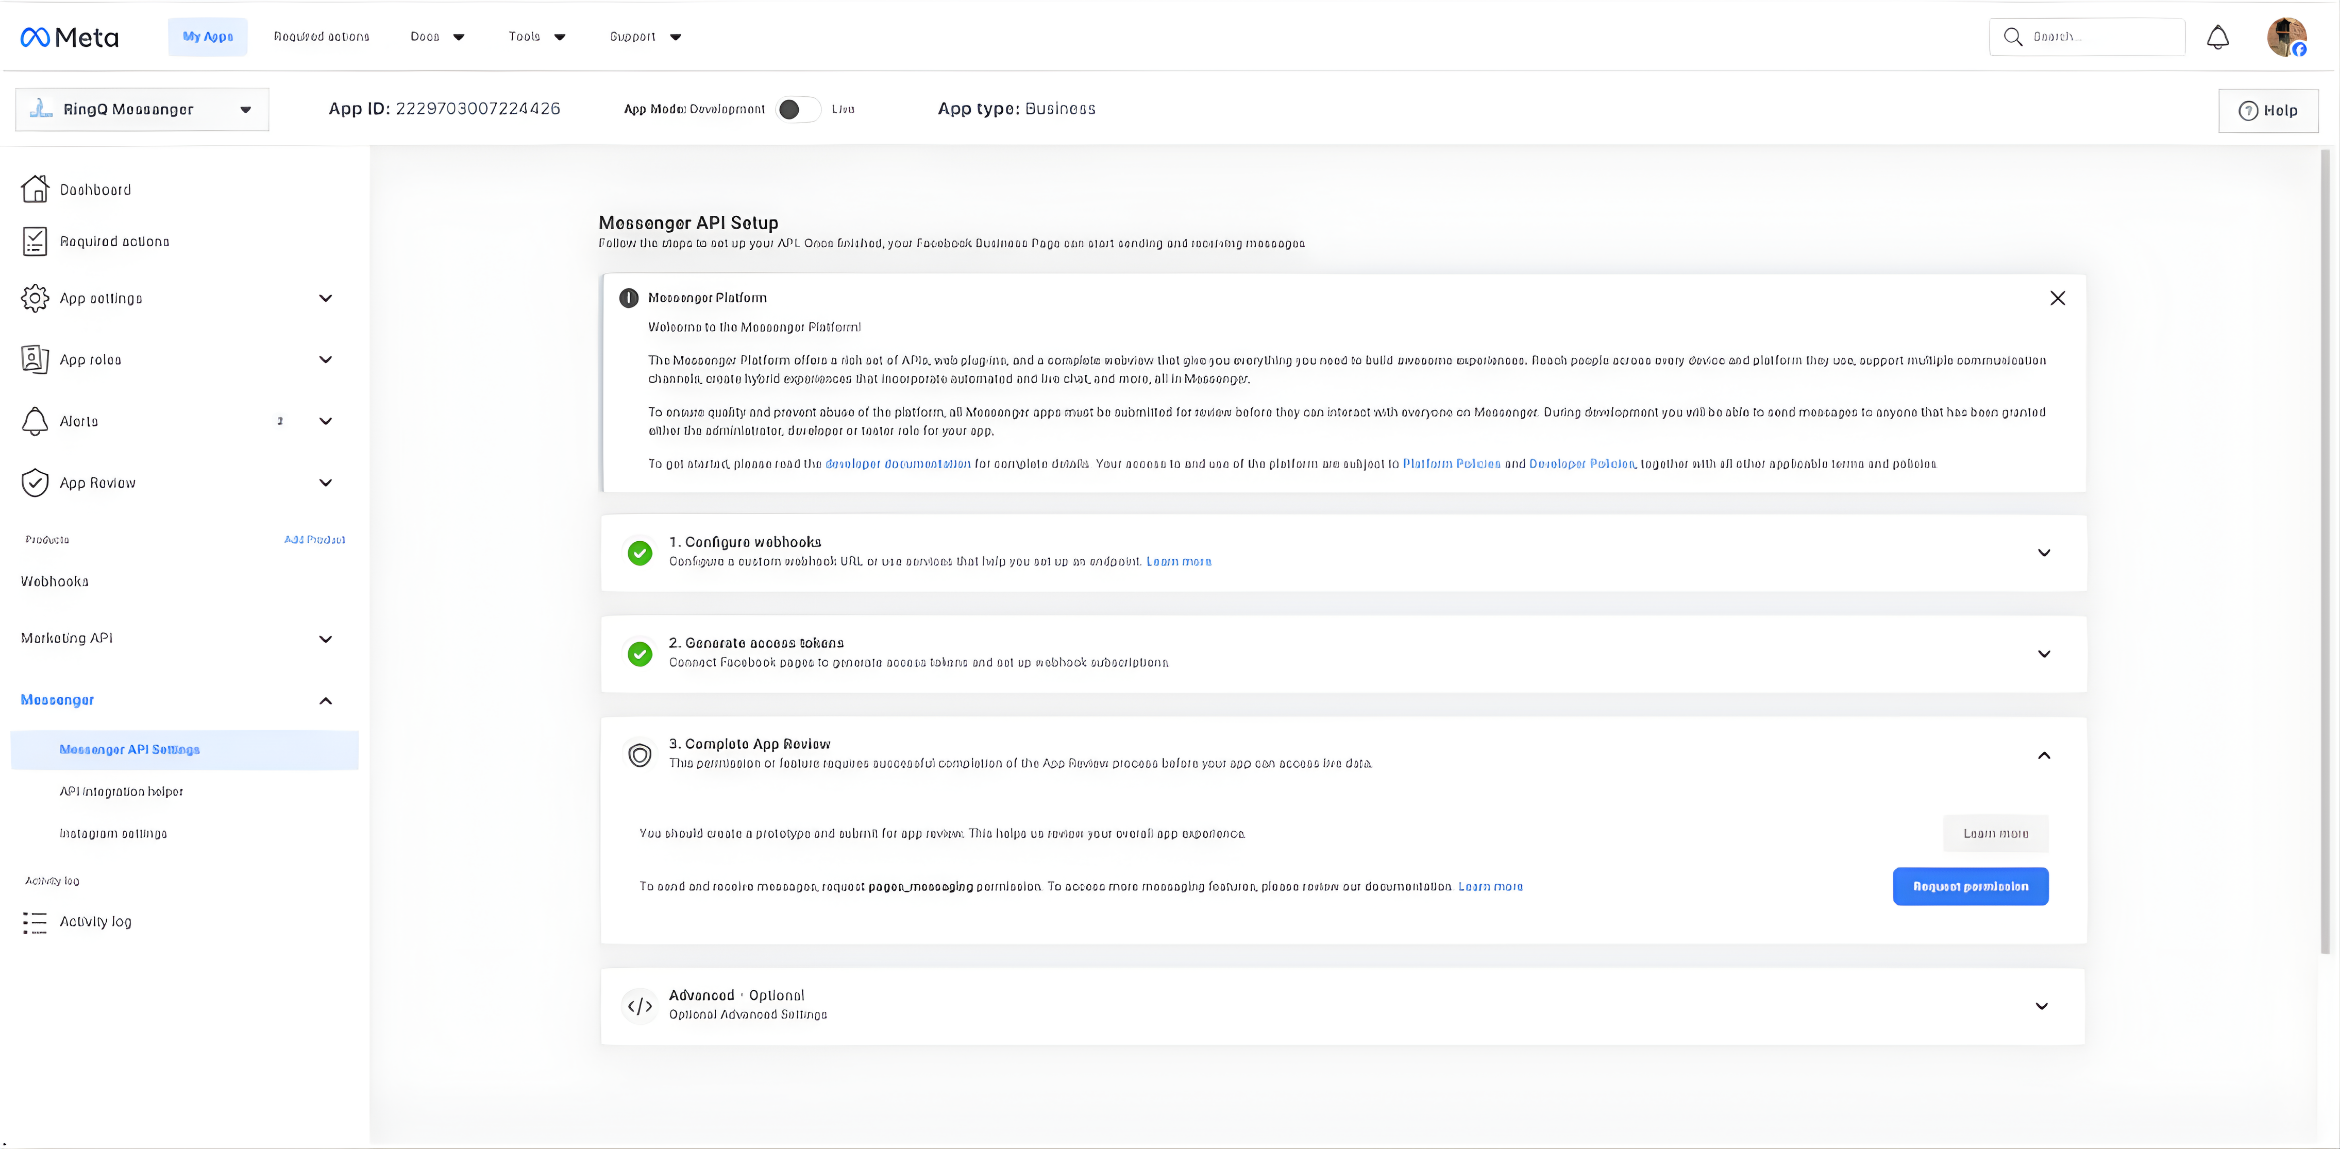
6. You will be redirected to the Messenger API Setup page, where the required API configurations are managed.
Get the Webhook and Verification Token
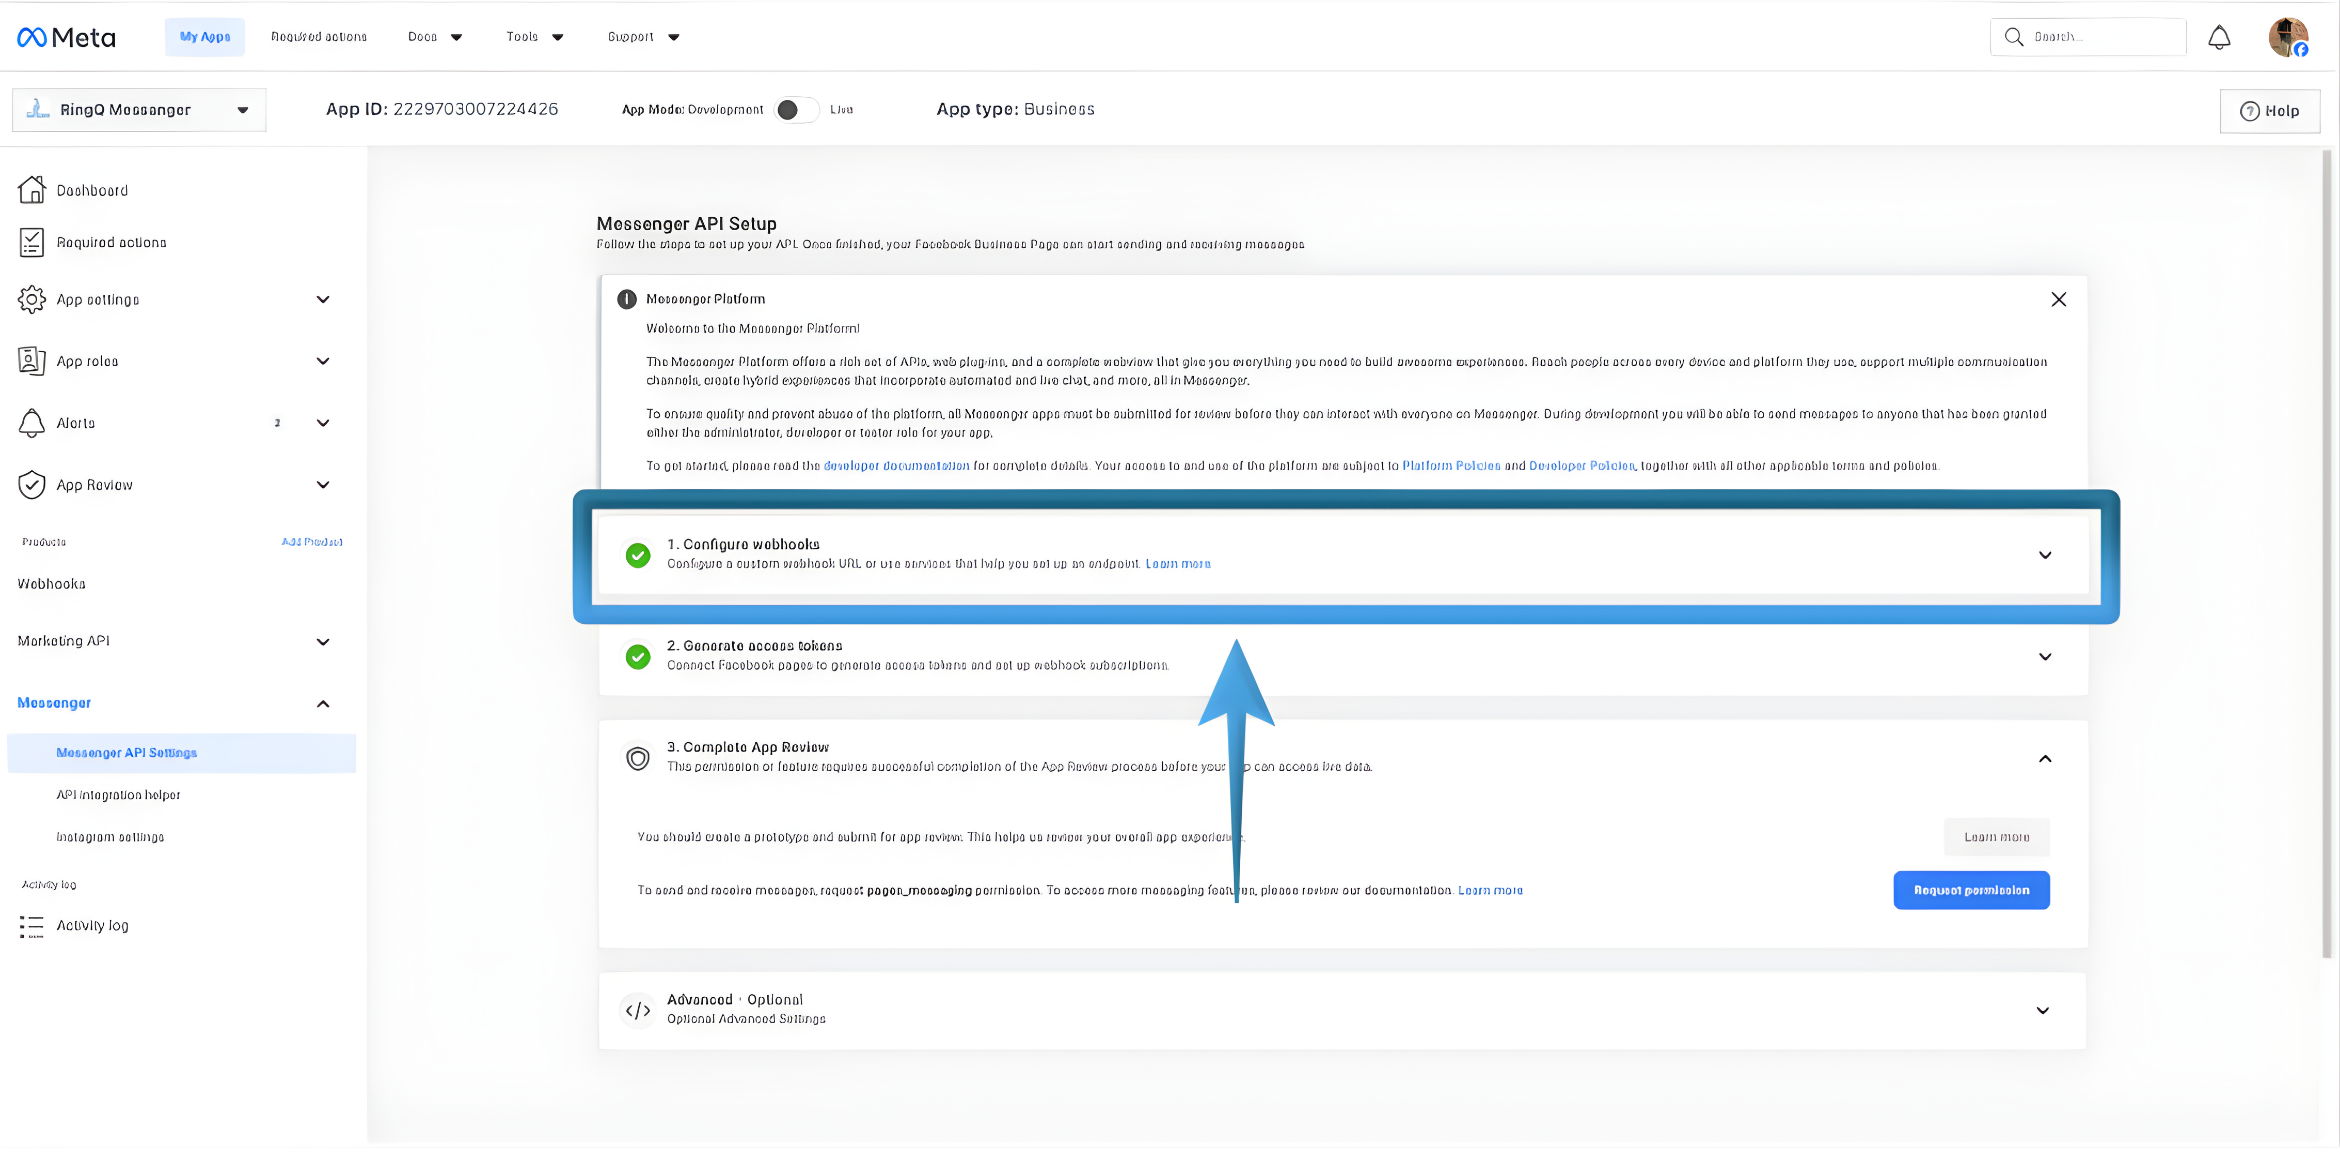
1. In the Messenger API Setup page, locate the Configure Webhooks section and expand the dropdown. 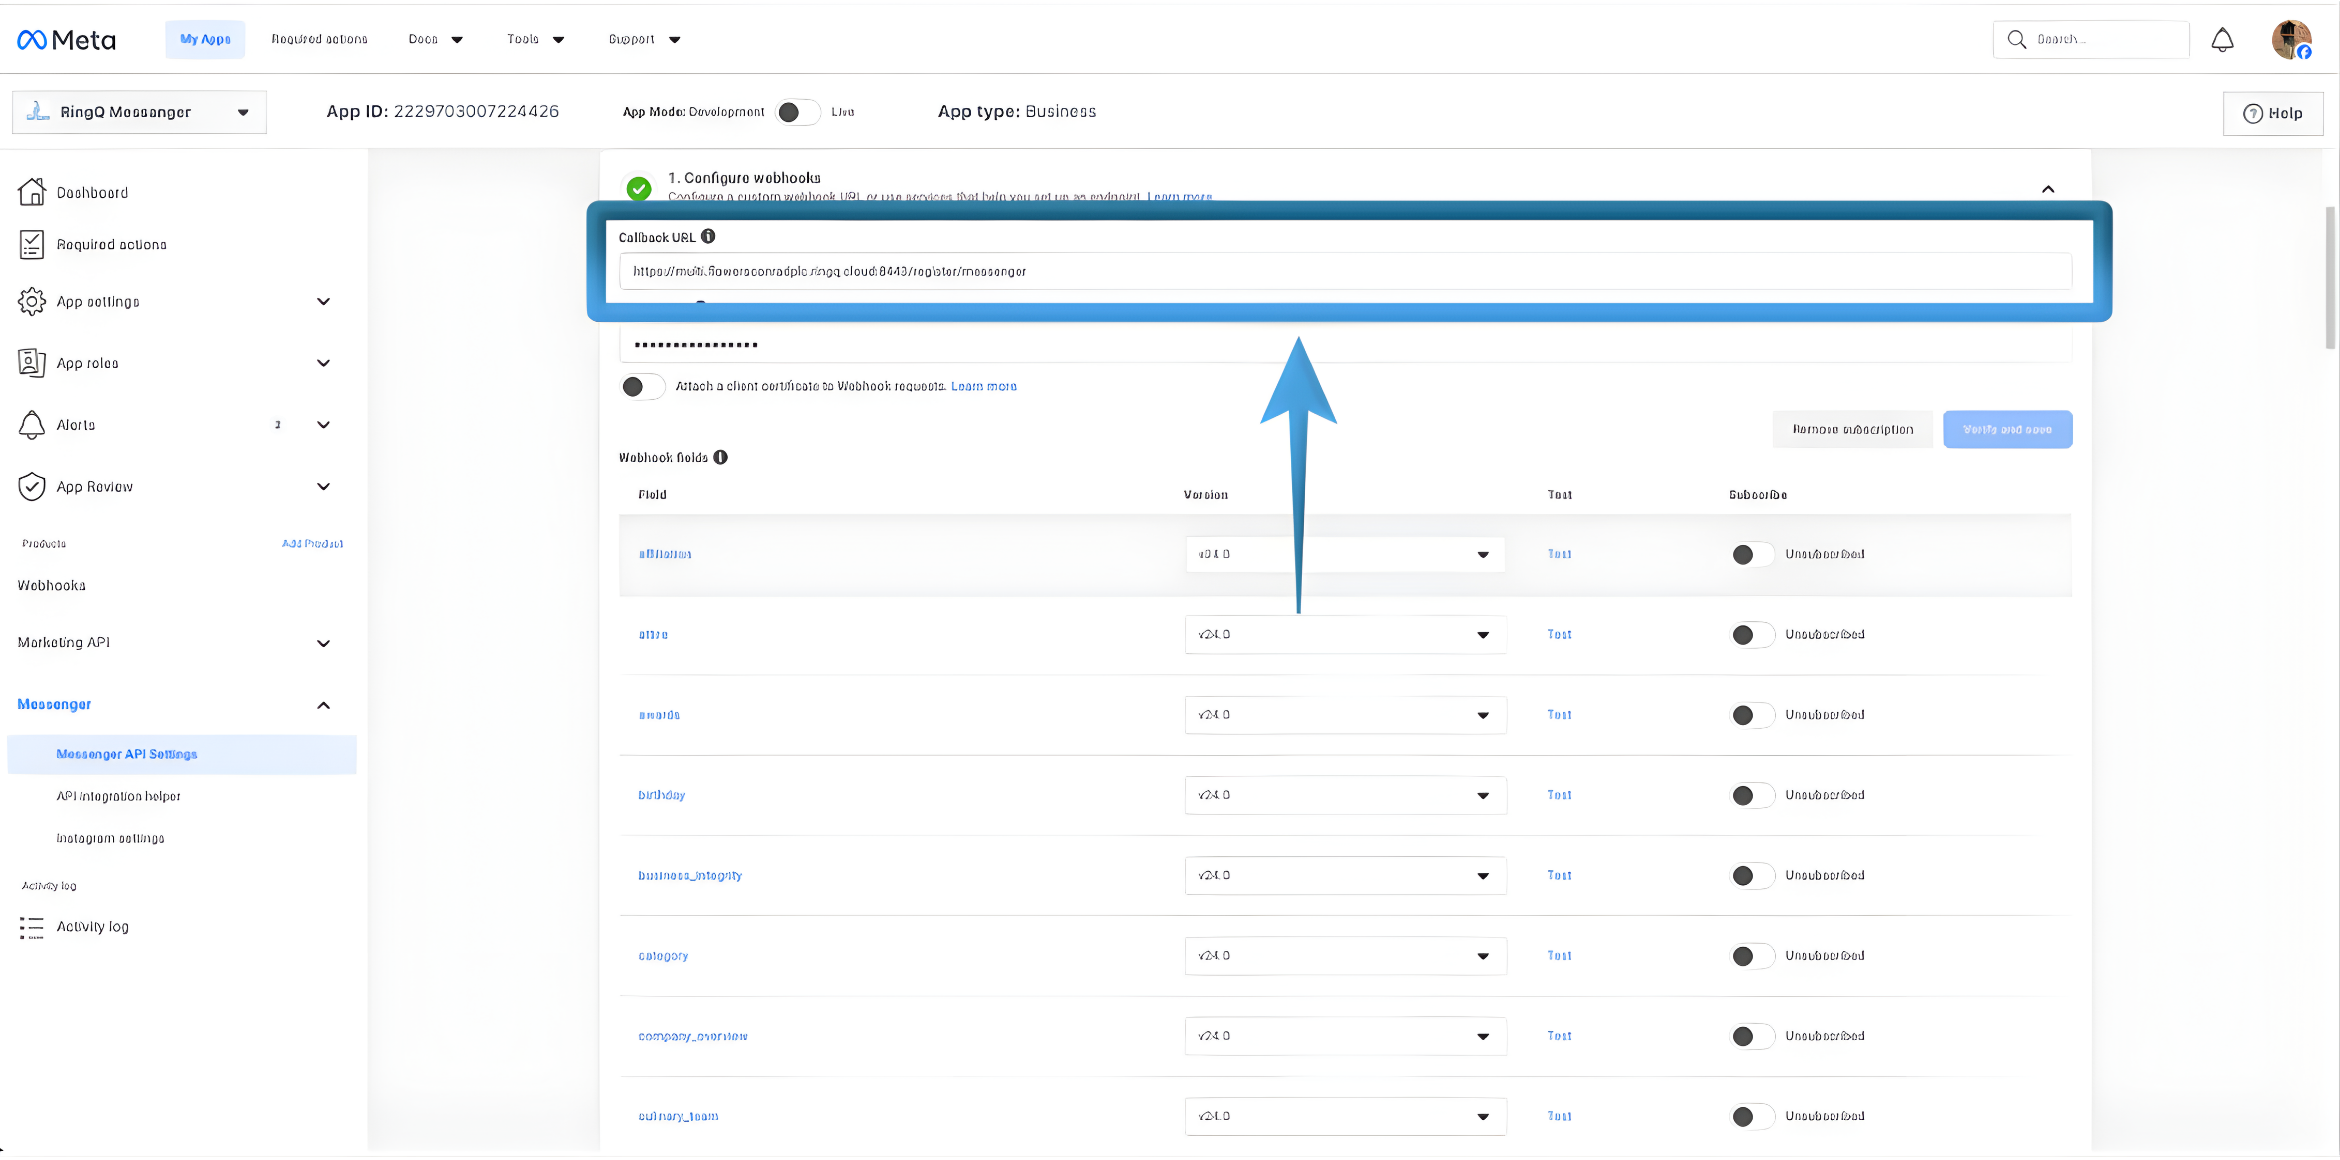
2. Under the Callback URL, you will see the webhook endpoint. This URL is where Meta sends real-time events such as incoming messages, replies, and status updates.
3. Once your Facebook account and Page are successfully verified during the registration process, the webhook is automatically established by Meta. This webhook is permanent and cannot be edited or changed.
4. Because the webhook is already preconfigured and fixed, there is no need to copy or paste the webhook URL into the RingQ Web App. RingQ automatically uses the established webhook for the Facebook Chat integration.
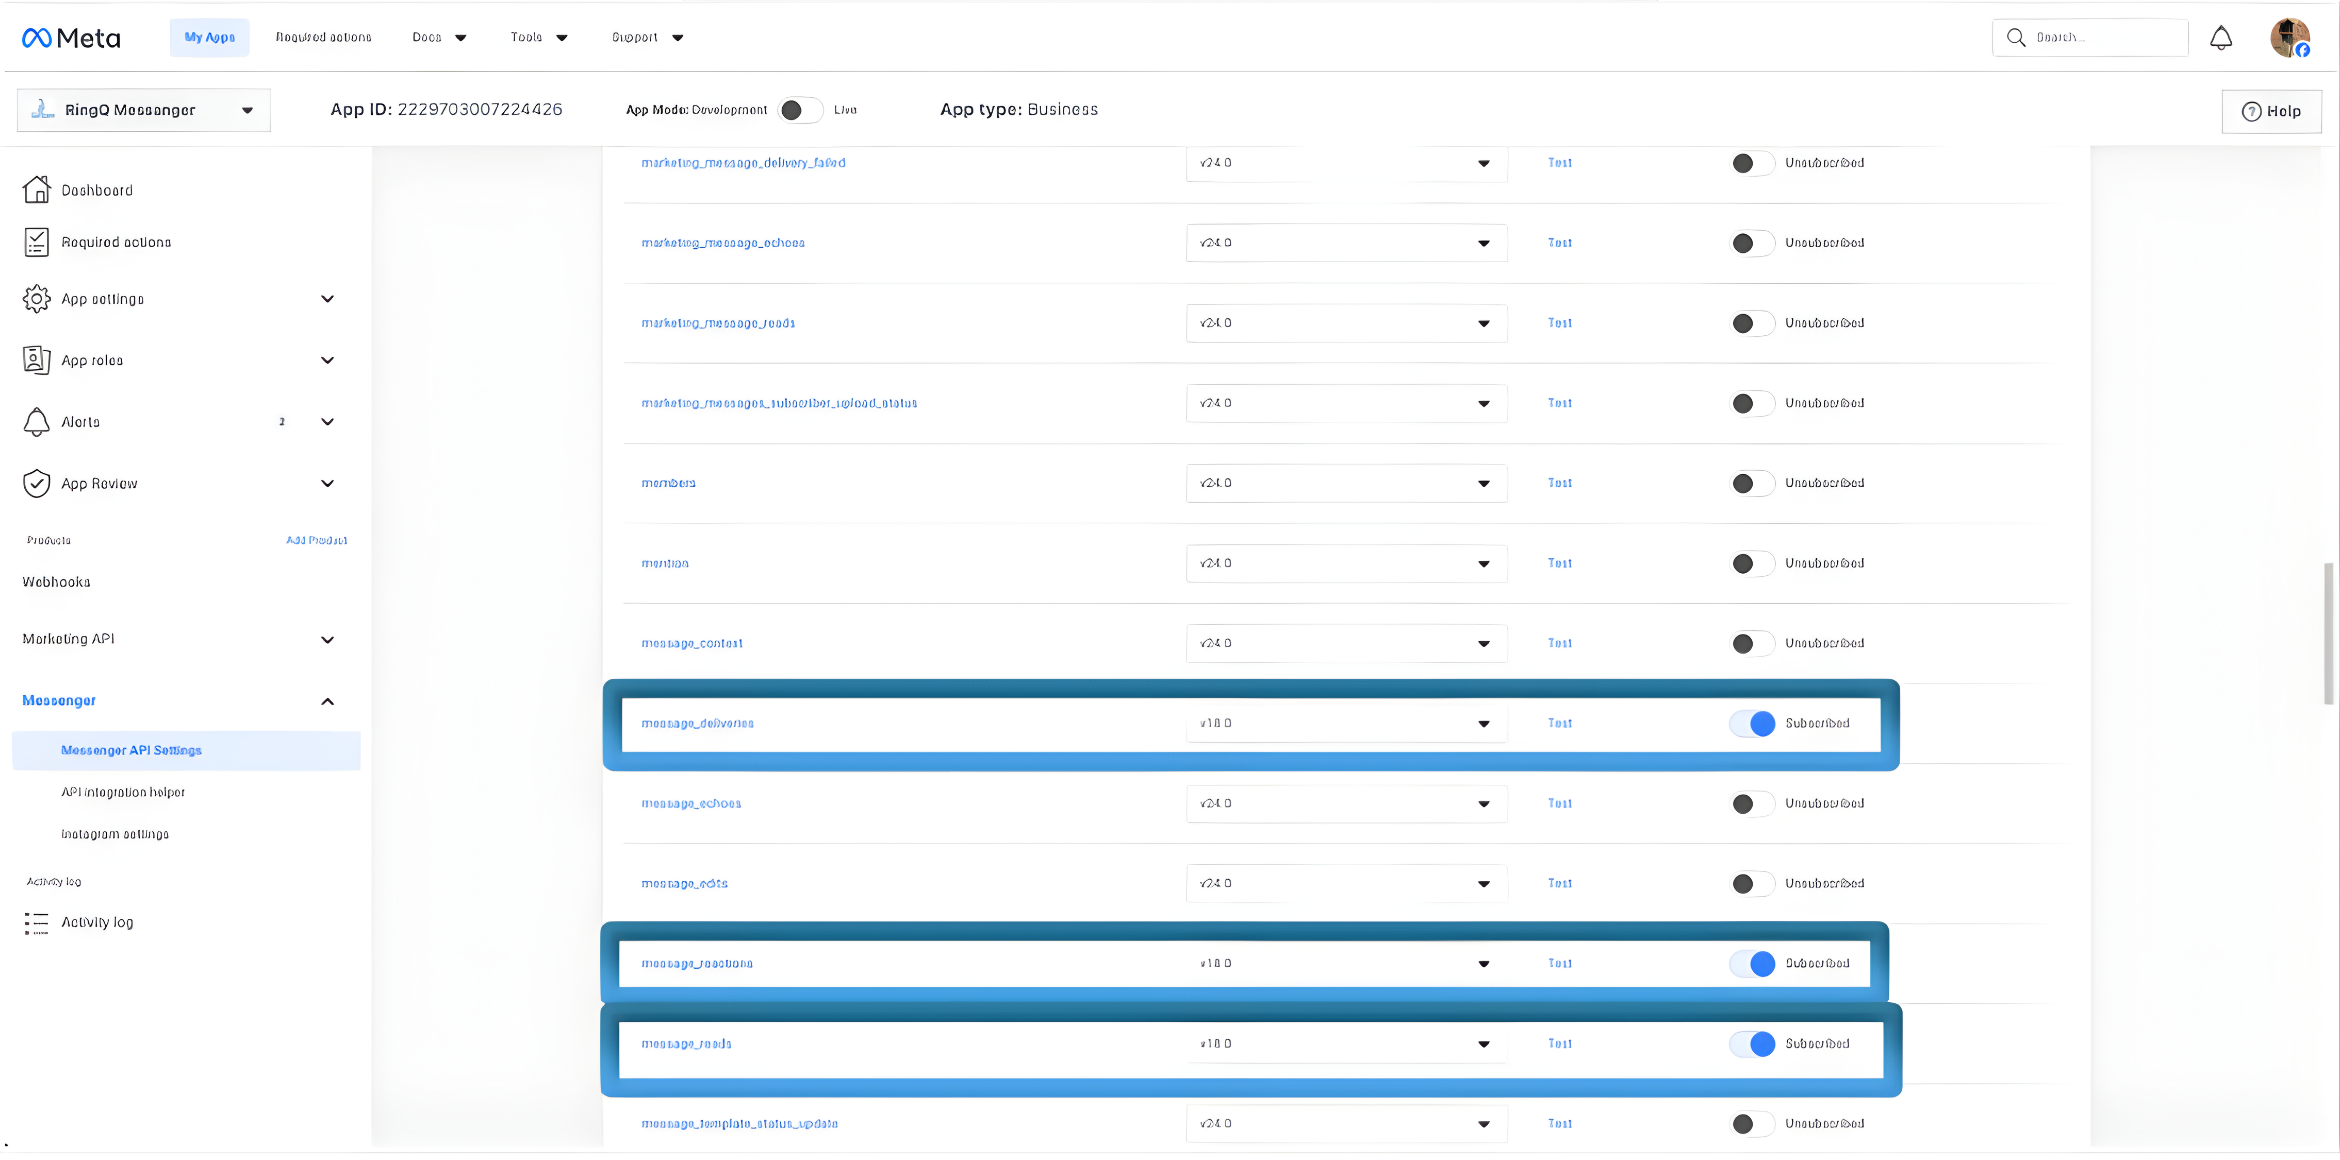 5. Ensure the Messages toggle is enabled to allow message events to be sent to RingQ.
6. The Verification Token configured here is used by RingQ to validate that webhook requests are genuinely coming from Meta. This token can be customized and defined by you; however, the exact same value must be used consistently.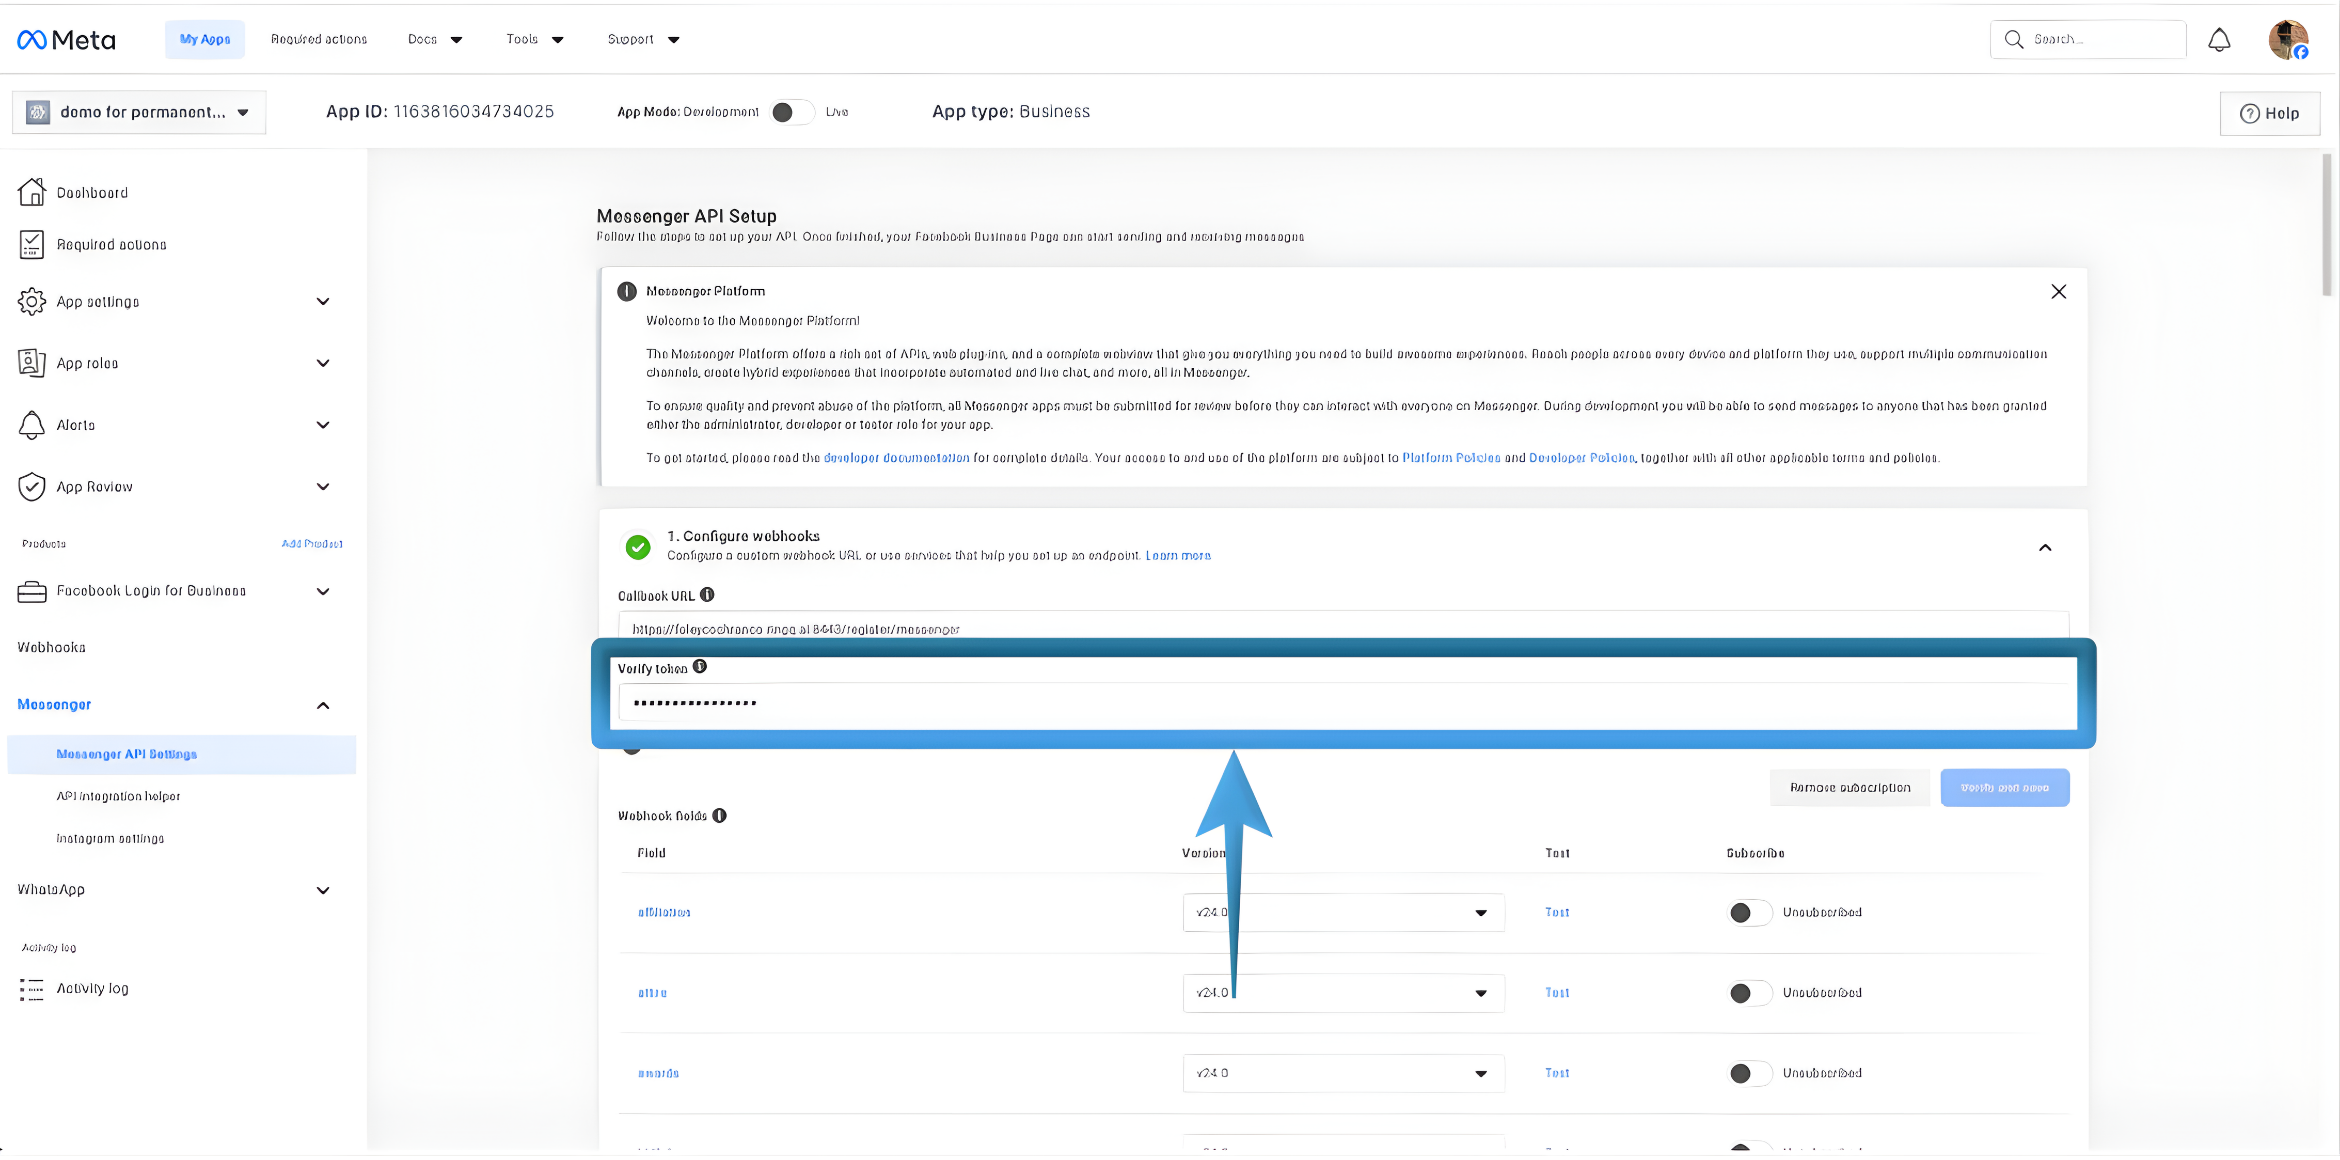
7. After customizing the Verification Token, highlight and copy the value.
Paste it into a note editor or text editor. This ensures the token is readily available when completing the Facebook Chat to RingQ configuration.
Ensure that the same Verification Token value is entered in both the Meta Developers webhook settings and the RingQ Facebook Chat configuration to successfully verify and establish the webhook connection.
Generate the Access Token
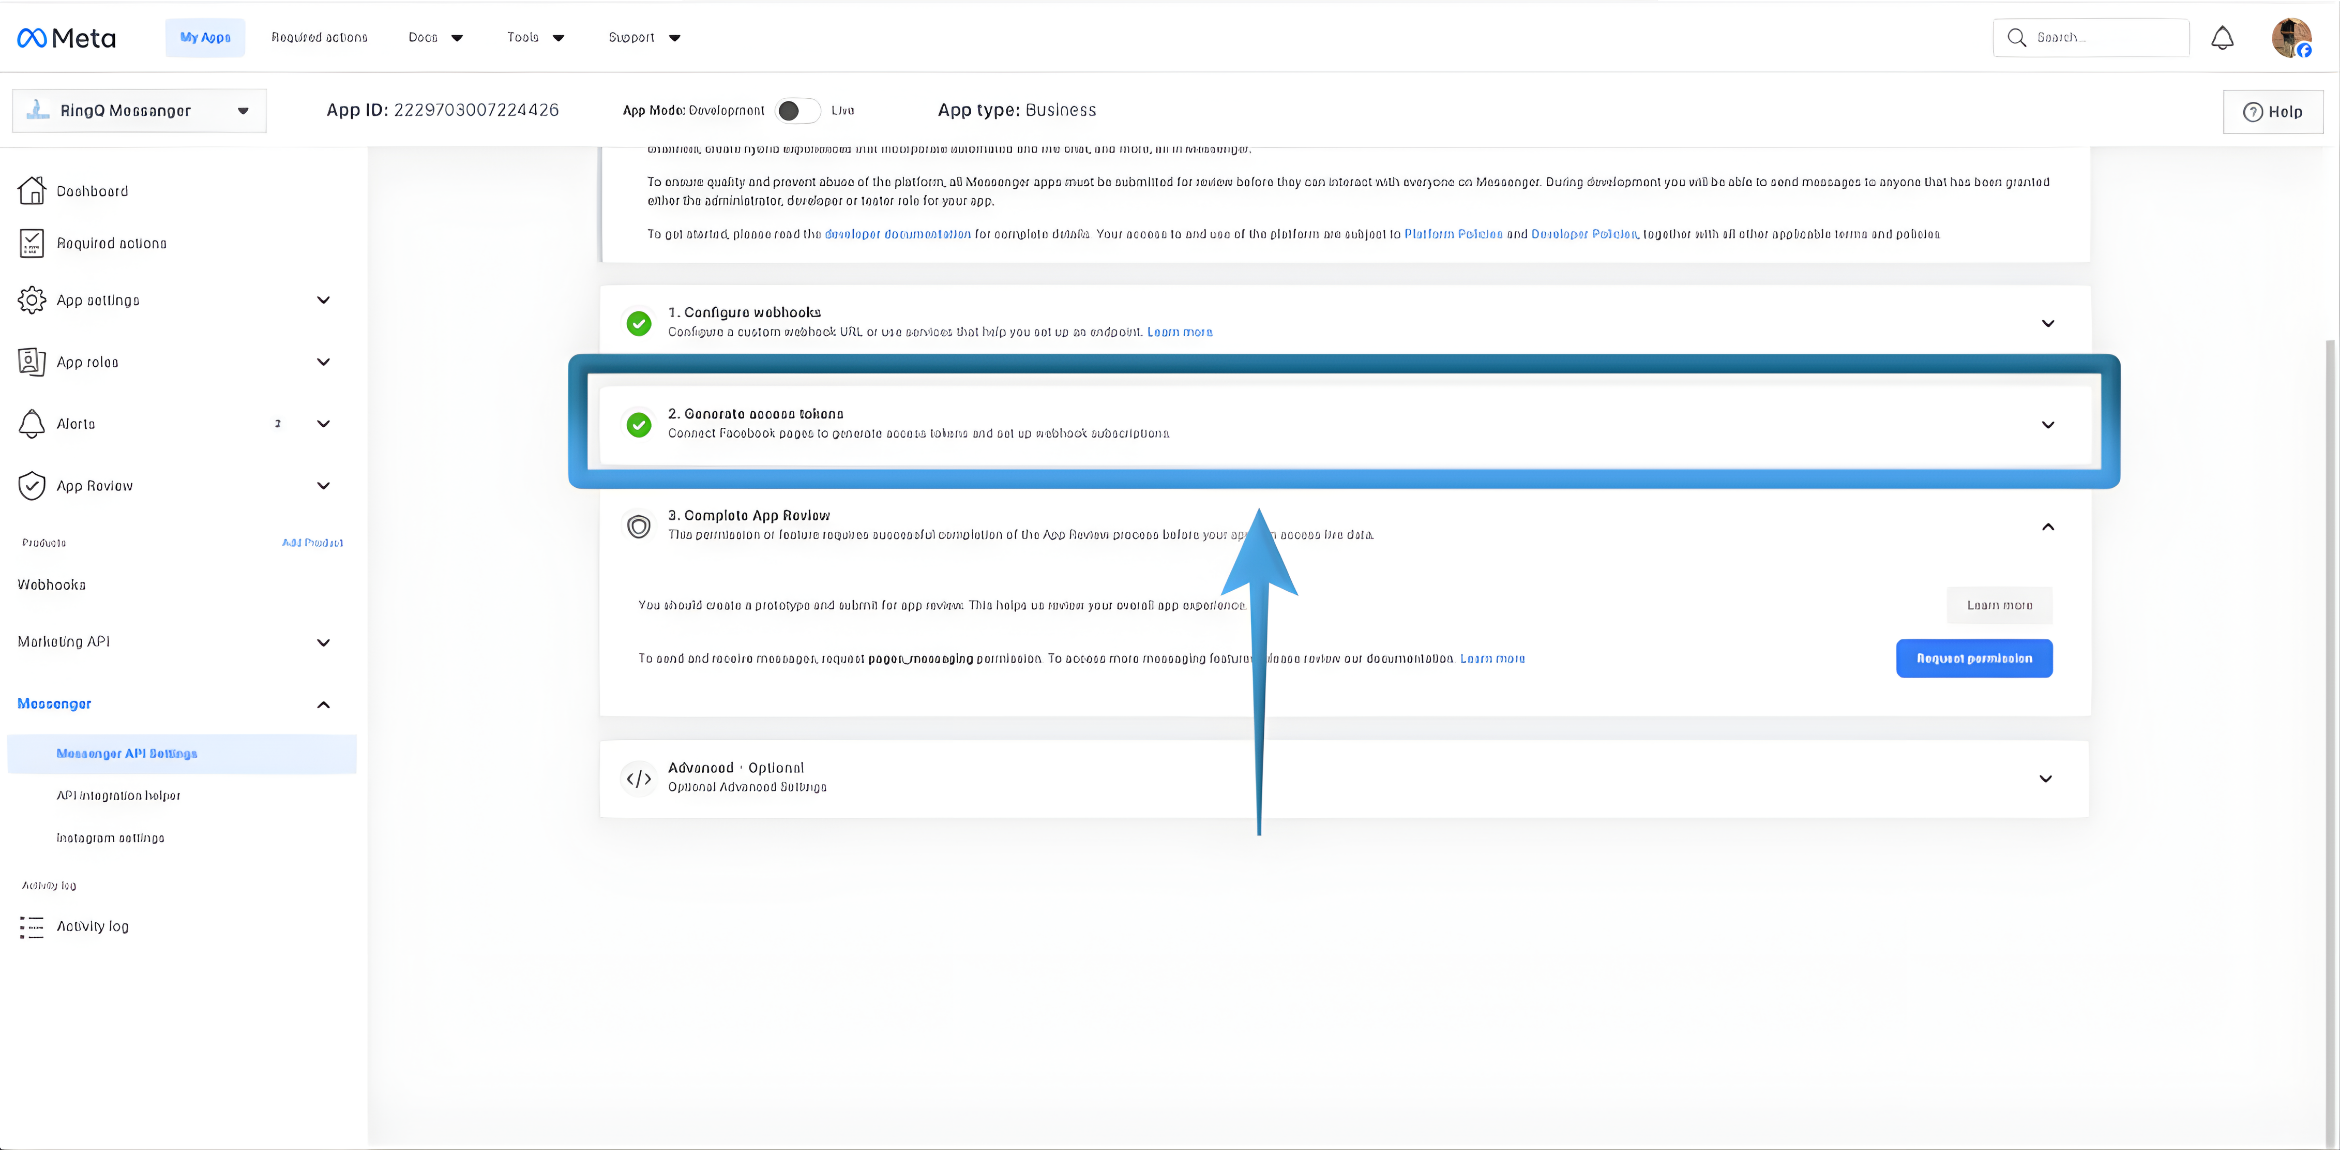
1. In the Messenger API Setup page, locate the Generate Access Tokens section. 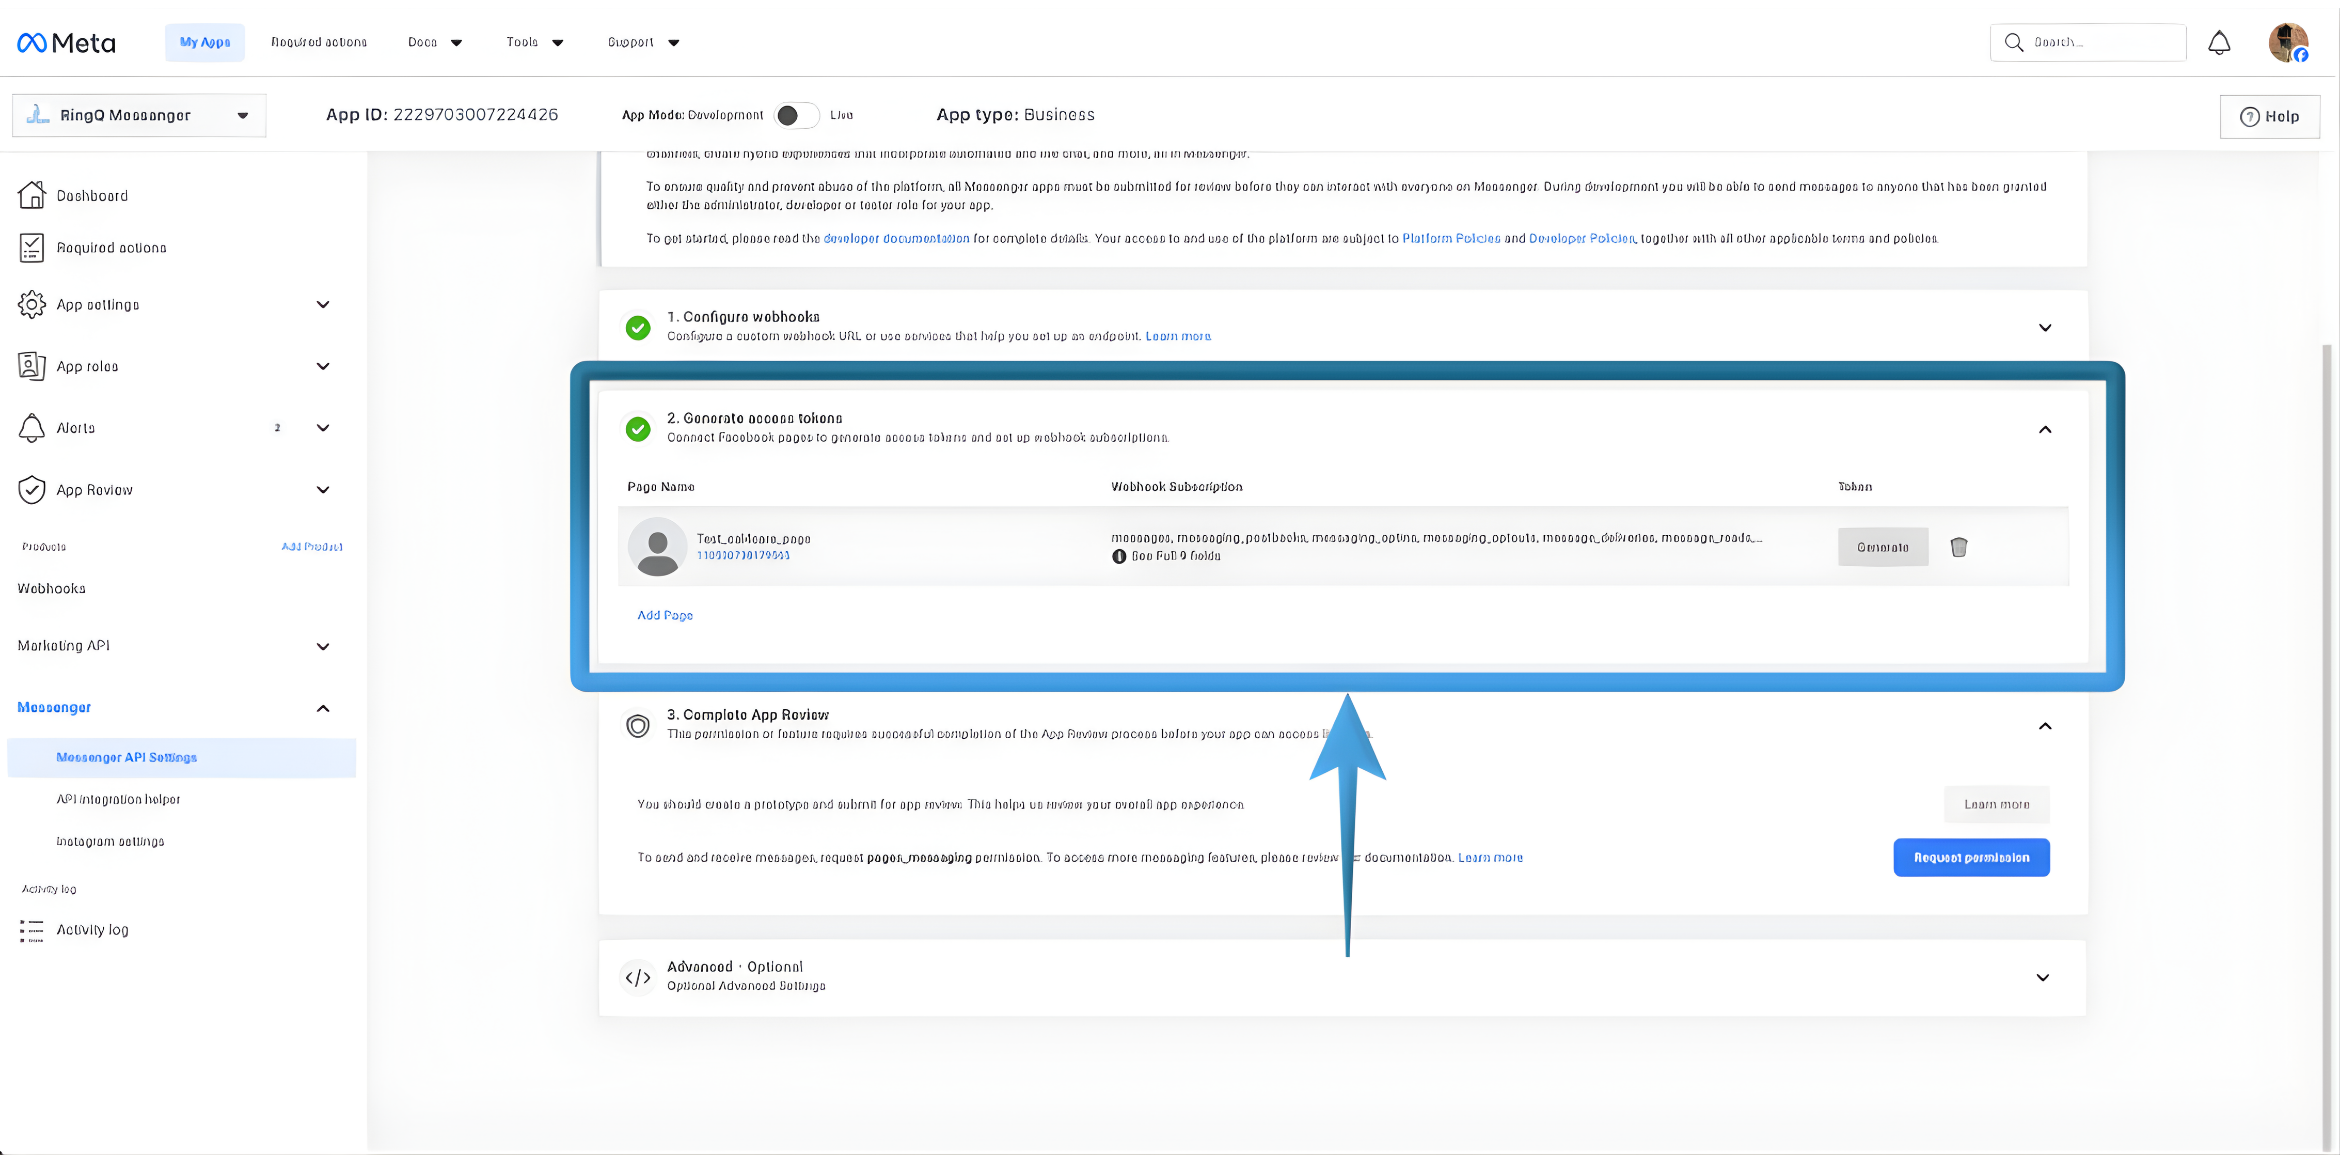
2. Expand the section to view available token options. 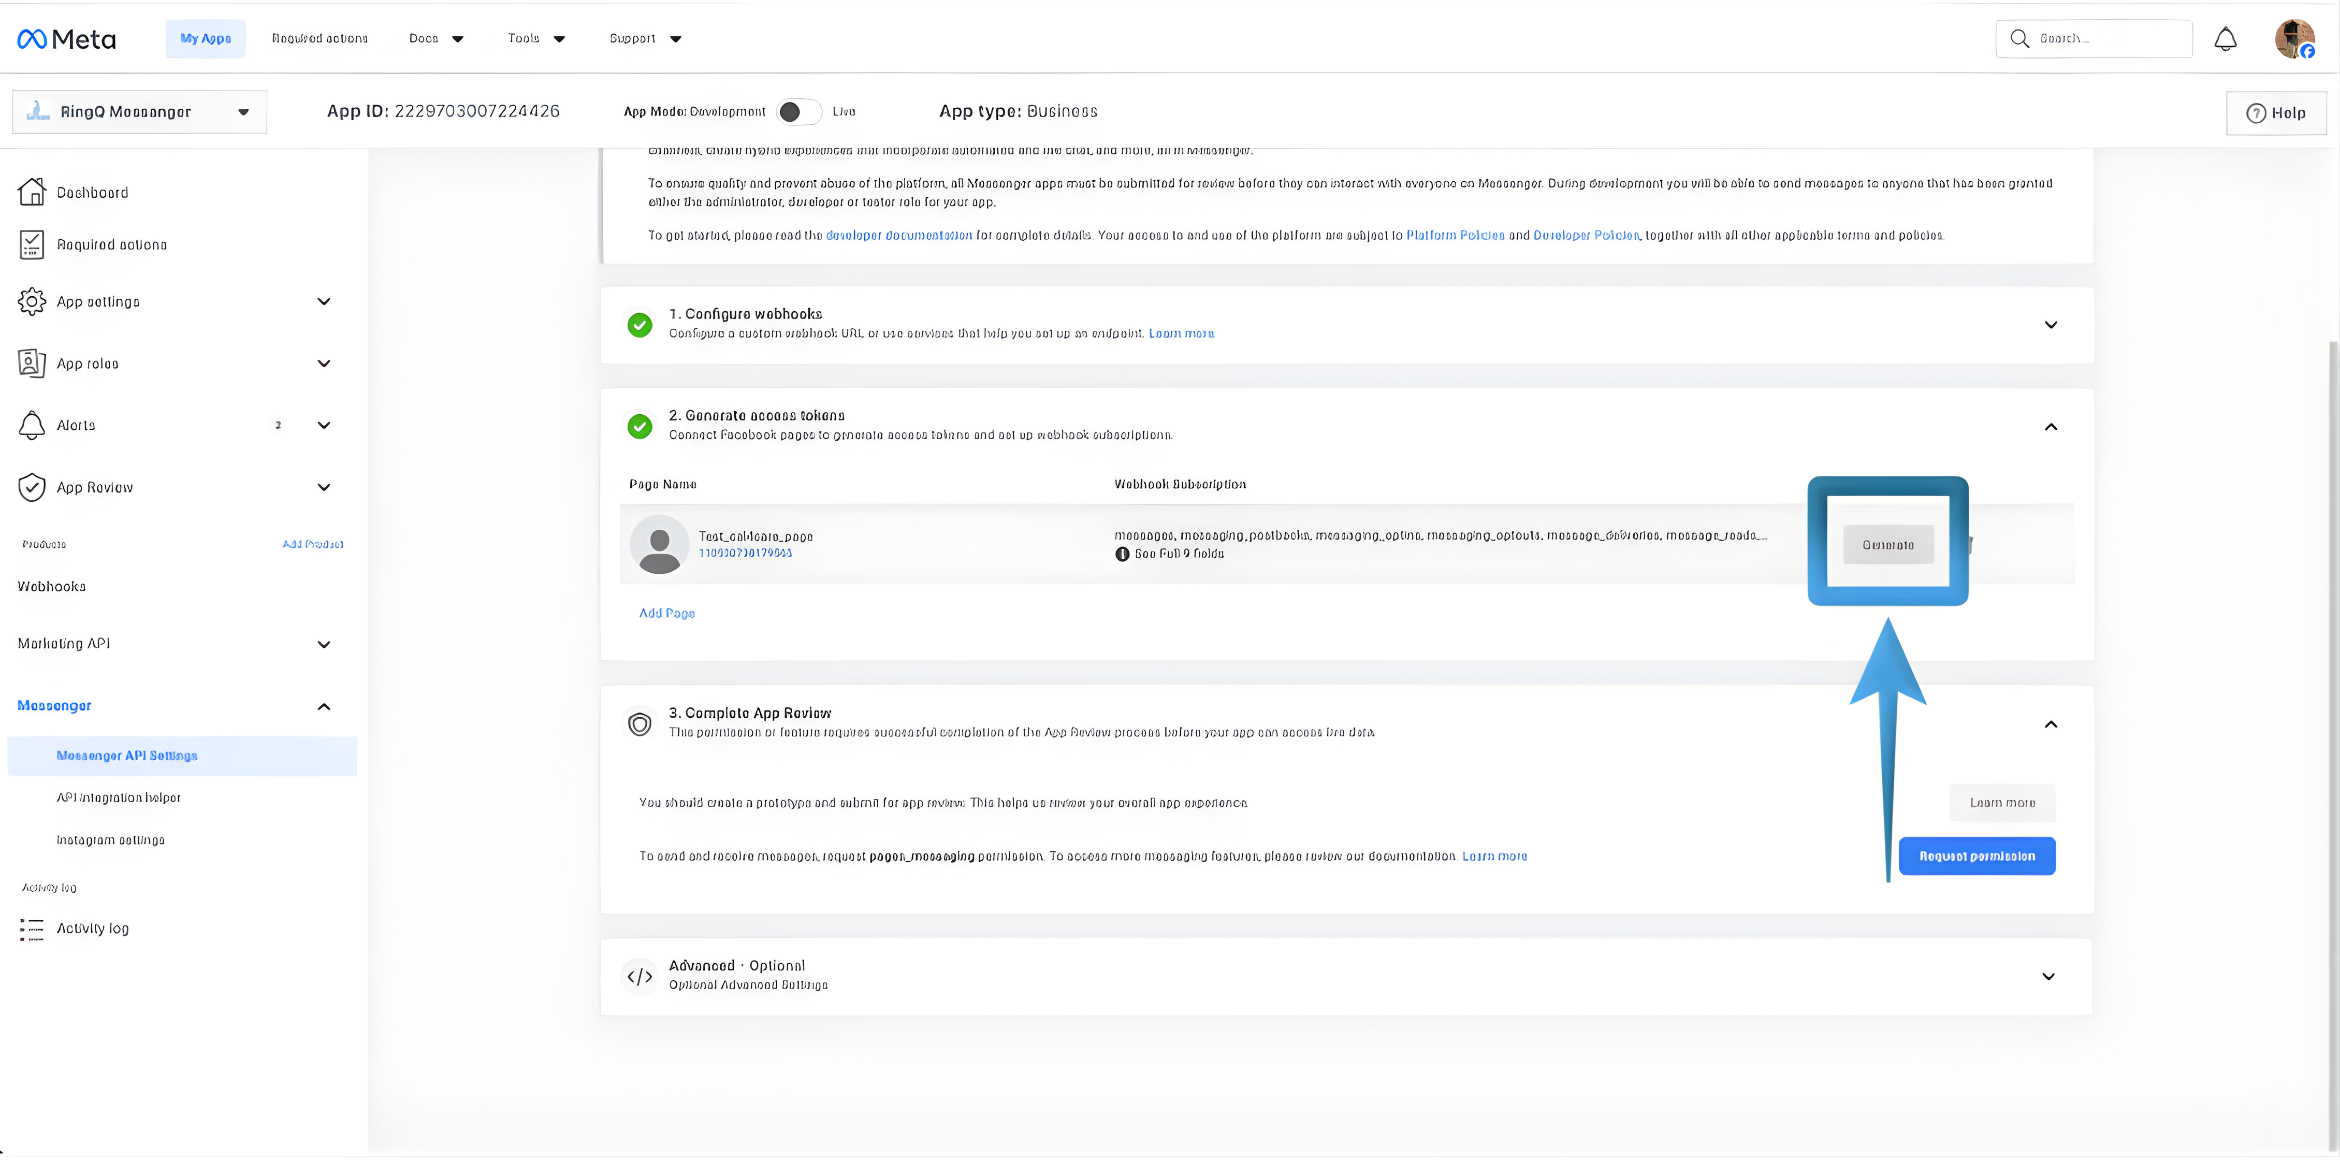
3. Click Generate Token for the appropriate Facebook Page.
4. A Token Generation window will appear. 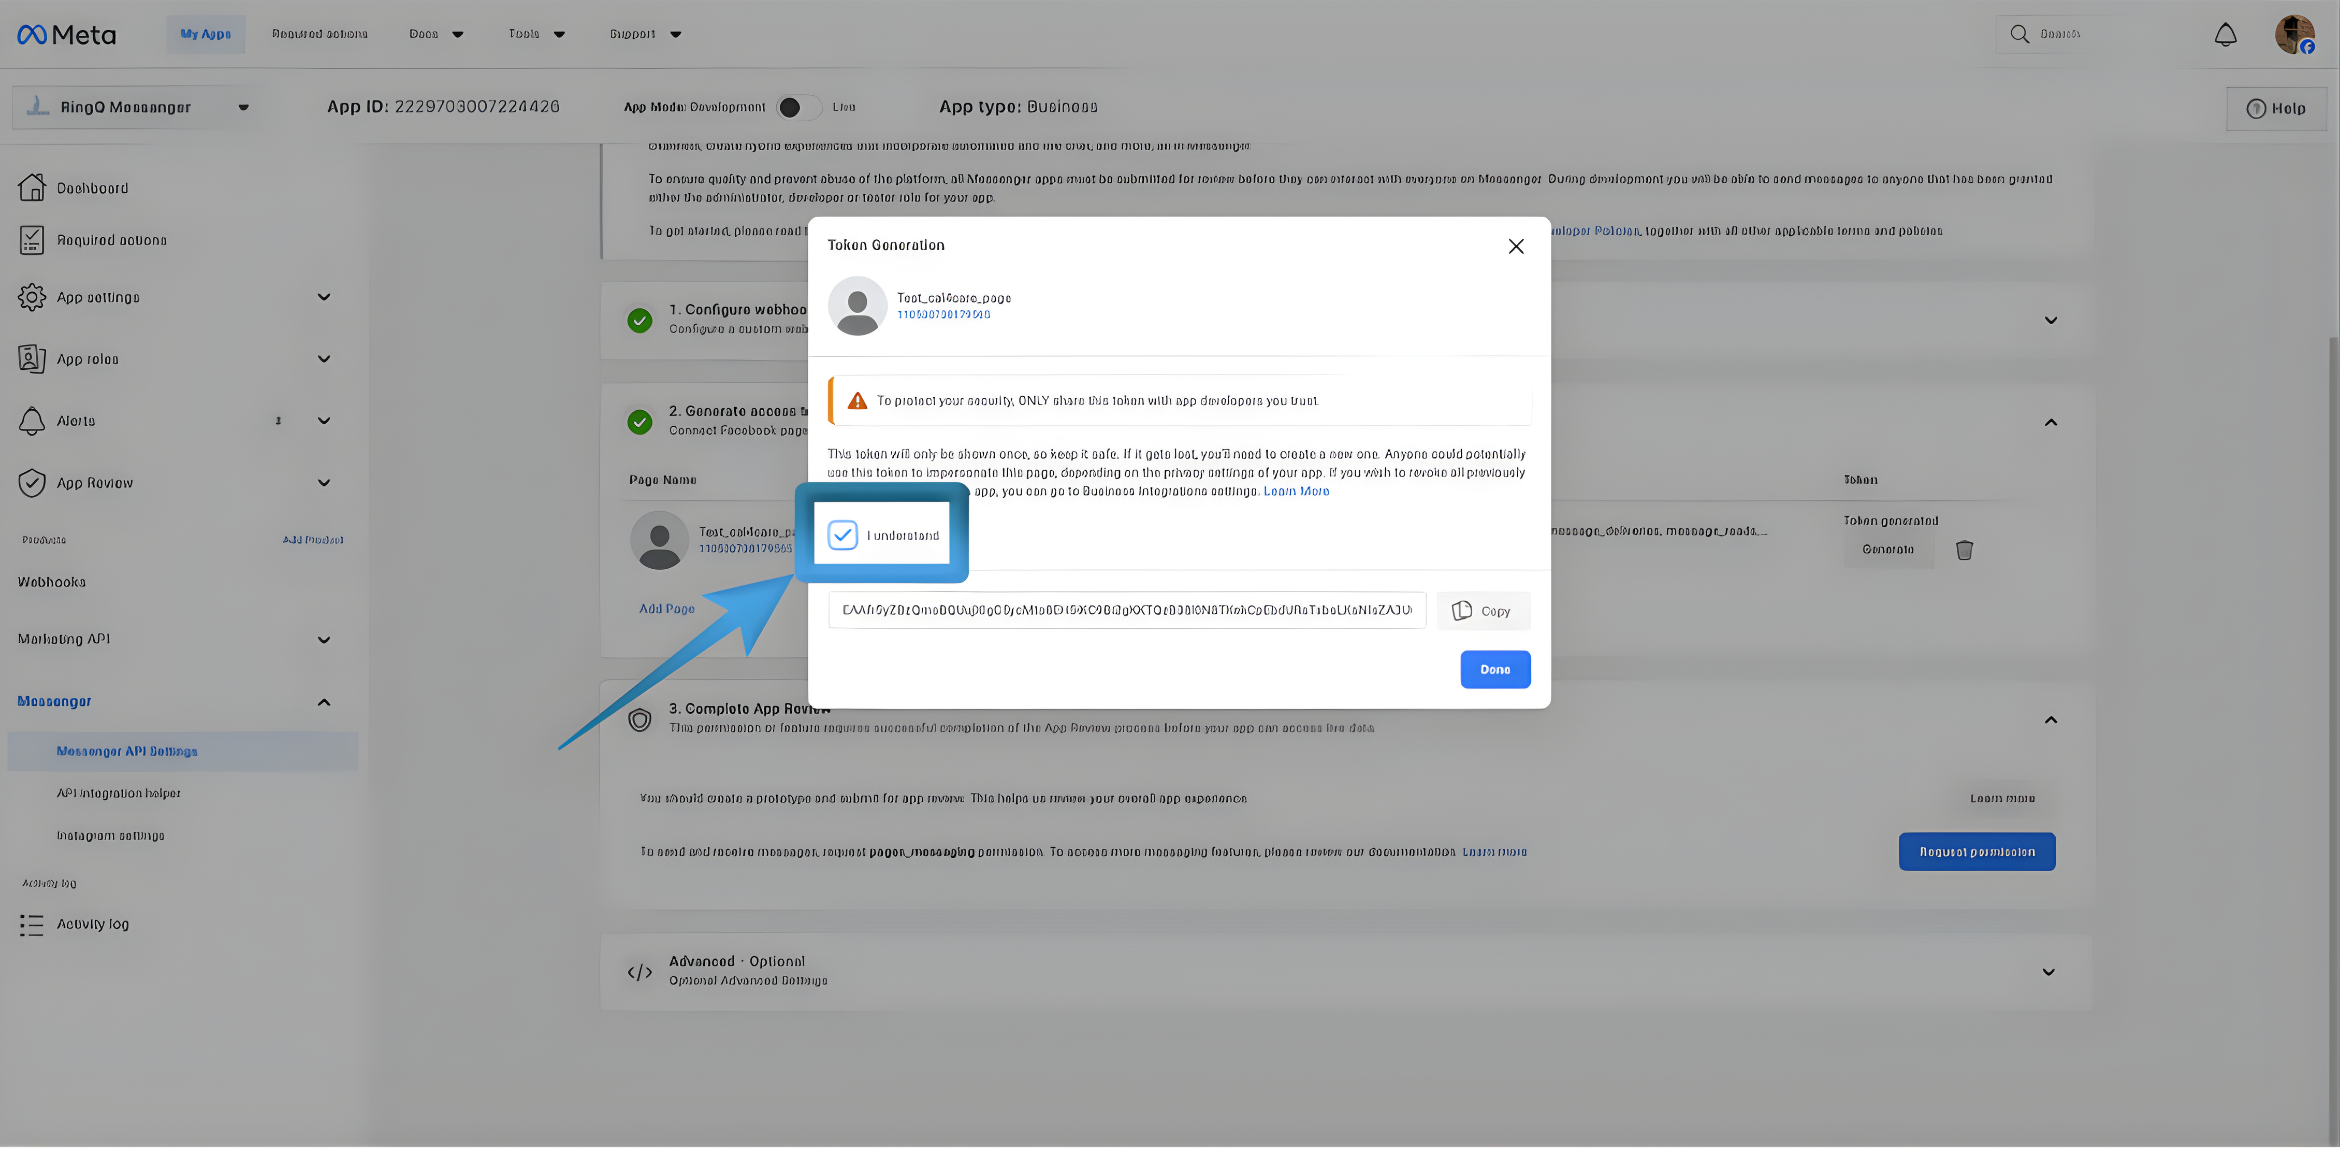
5. Check the I understand checkbox to enable the Copy button. 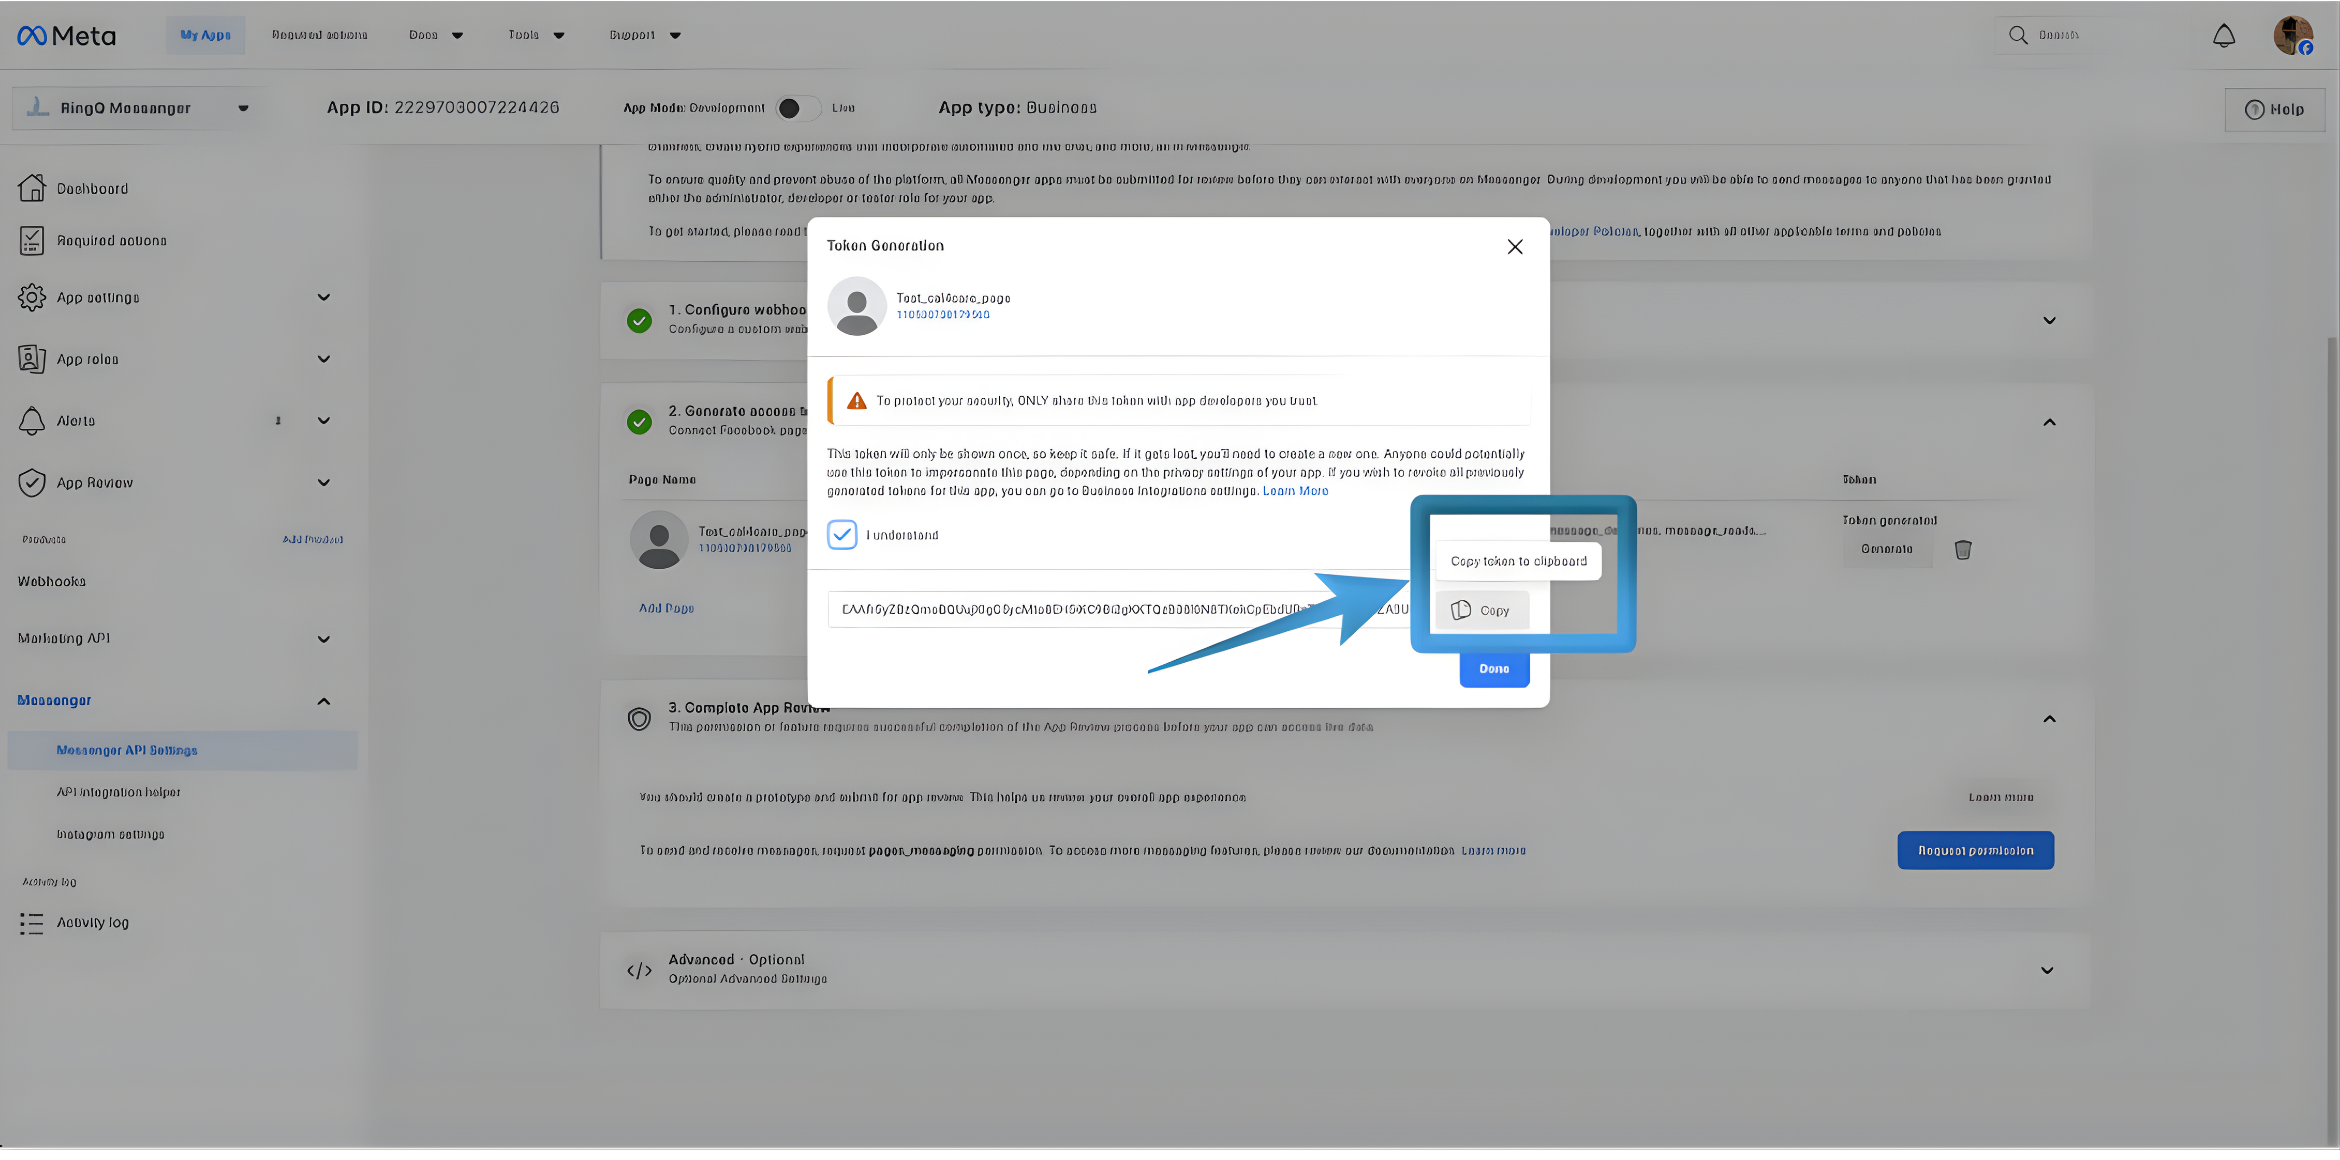
6. Click Copy to copy the Access Token.
7. Once copied, paste the information into a note editor or text editor and save it for future reference. This ensures the details are readily available when configuring and integrating Facebook Chat with the RingQ Web App.
8. Click Done to proceed and close the Token Generation page. This Access Token will be used in the RingQ Web App to authenticate Facebook chat communication.
Get the Page ID
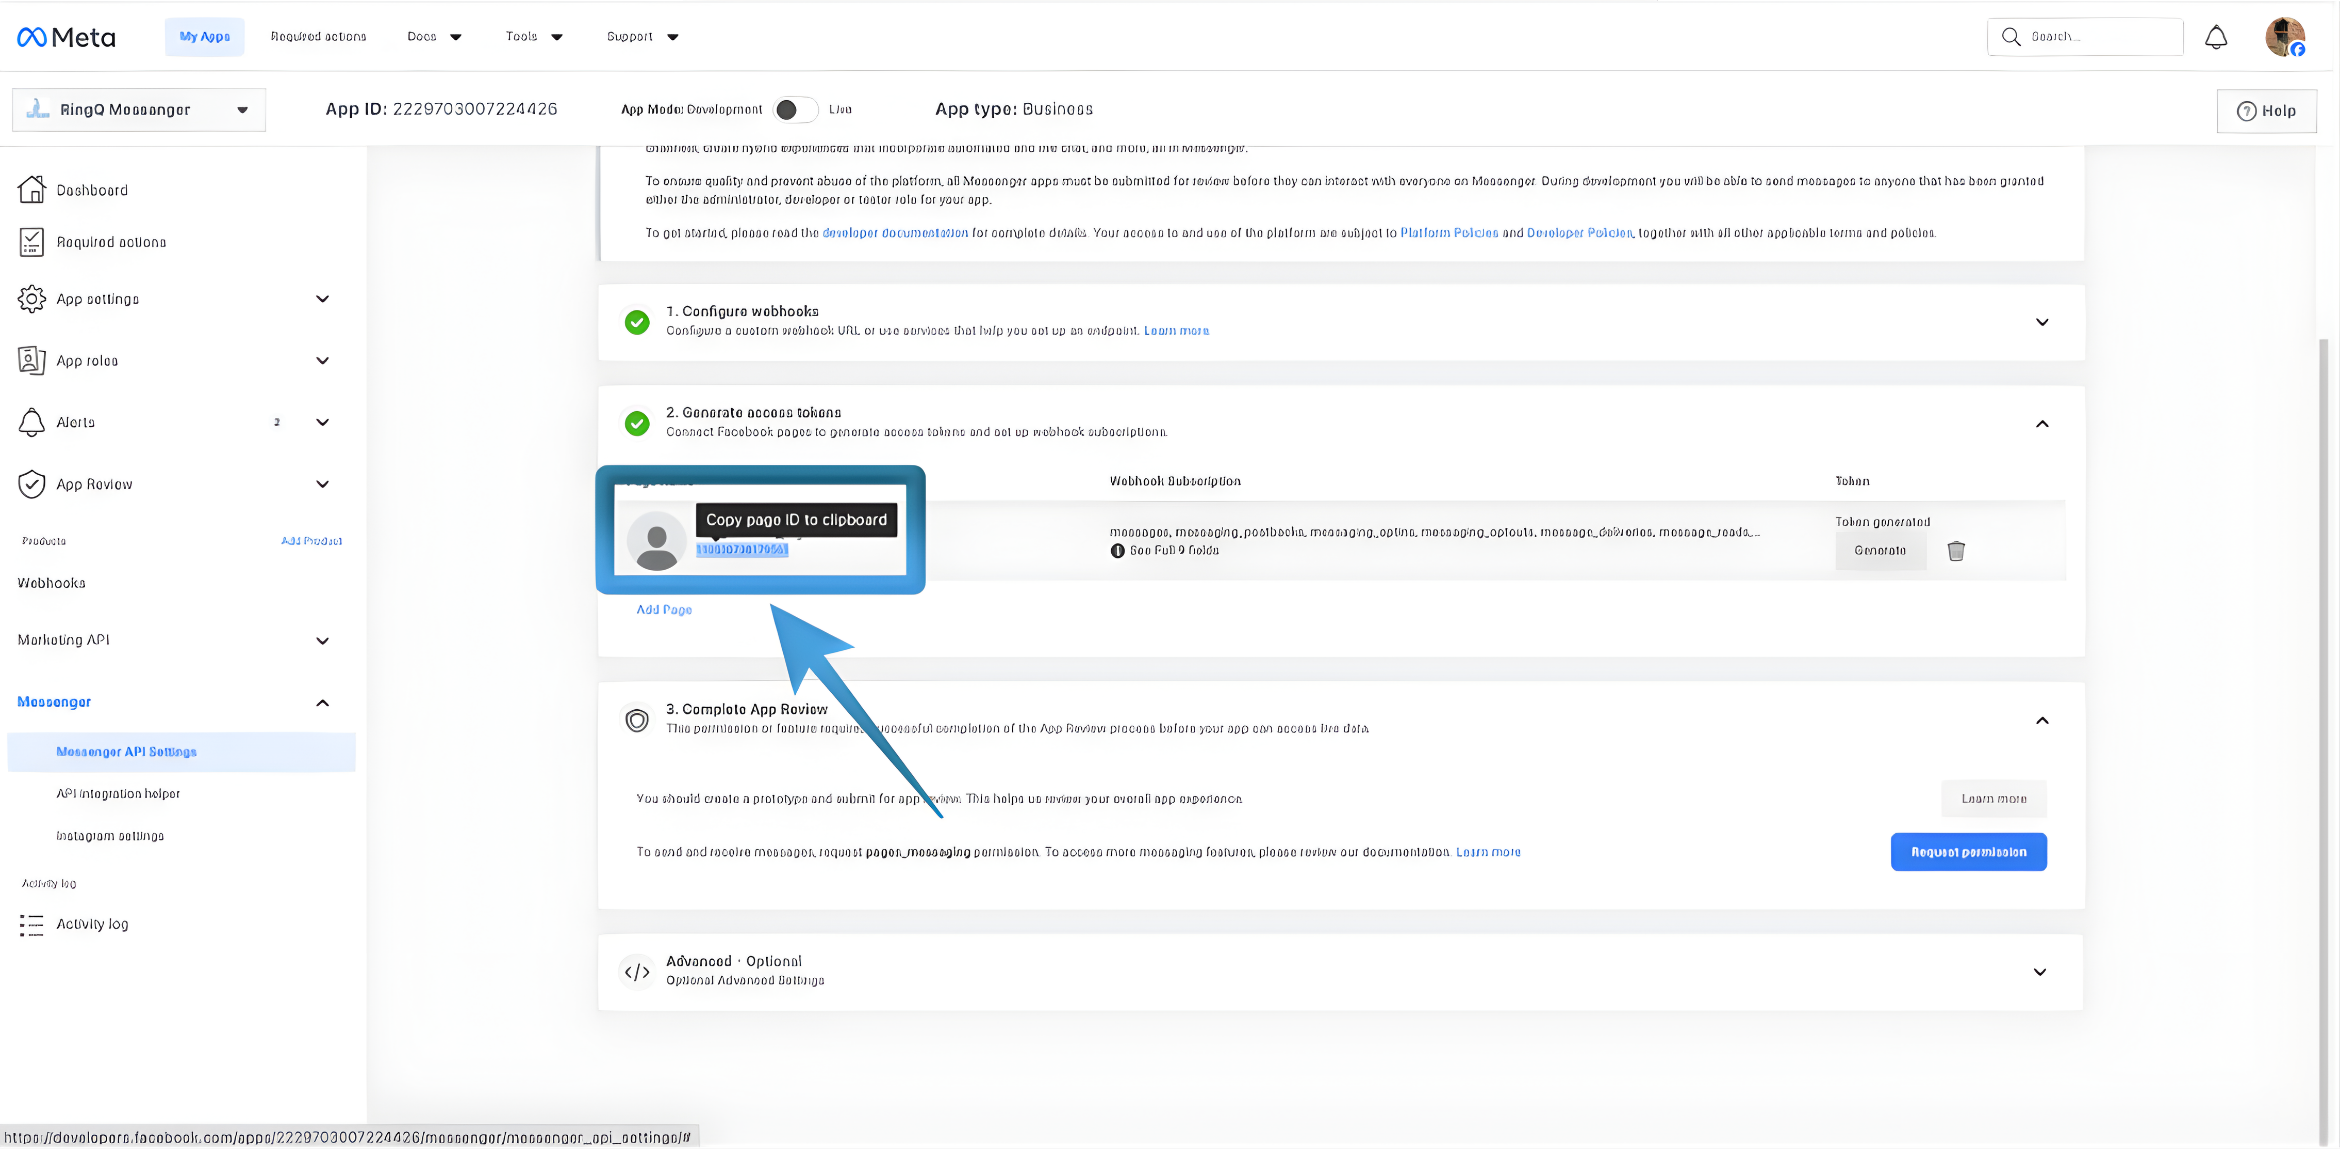
1. In the app settings, locate the Page Name associated with your Facebook Page.
2. Under the Page Name, you will see a numeric value. This numeric value is the Page ID.
3. Highlight and copy the Page ID. Once copied, paste it into a note editor or text editor together with the other collected configuration details and save it for future reference. This ensures the information is readily available when configuring and integrating Facebook Chat with the RingQ Web App.
Add to RingQ
You can now input all the collected information—Webhook, Verification Token, Access Token, and Page ID—into the Facebook Chat configuration section of the RingQ Web App to complete the setup.
Follow the Generating a Facebook App ID and Configuring Facebook in the Web App guides.