Introduction
Call transfers are essential for efficient communication and professional call handling. RingQ supports both Attended Transfers and Blind Transfers, giving your team the flexibility to manage calls based on the situation.
This guide explains the differences between the two transfer types and provides step-by-step instructions on how to use each. Whether you need to speak with a colleague before transferring a call (Attended Transfer) or send it directly without introduction (Blind Transfer), RingQ makes it easy to ensure smooth handovers and an uninterrupted caller experience.
Attended Transfer
An Attended Transfer allows an agent to speak with the recipient first before completing the call transfer. 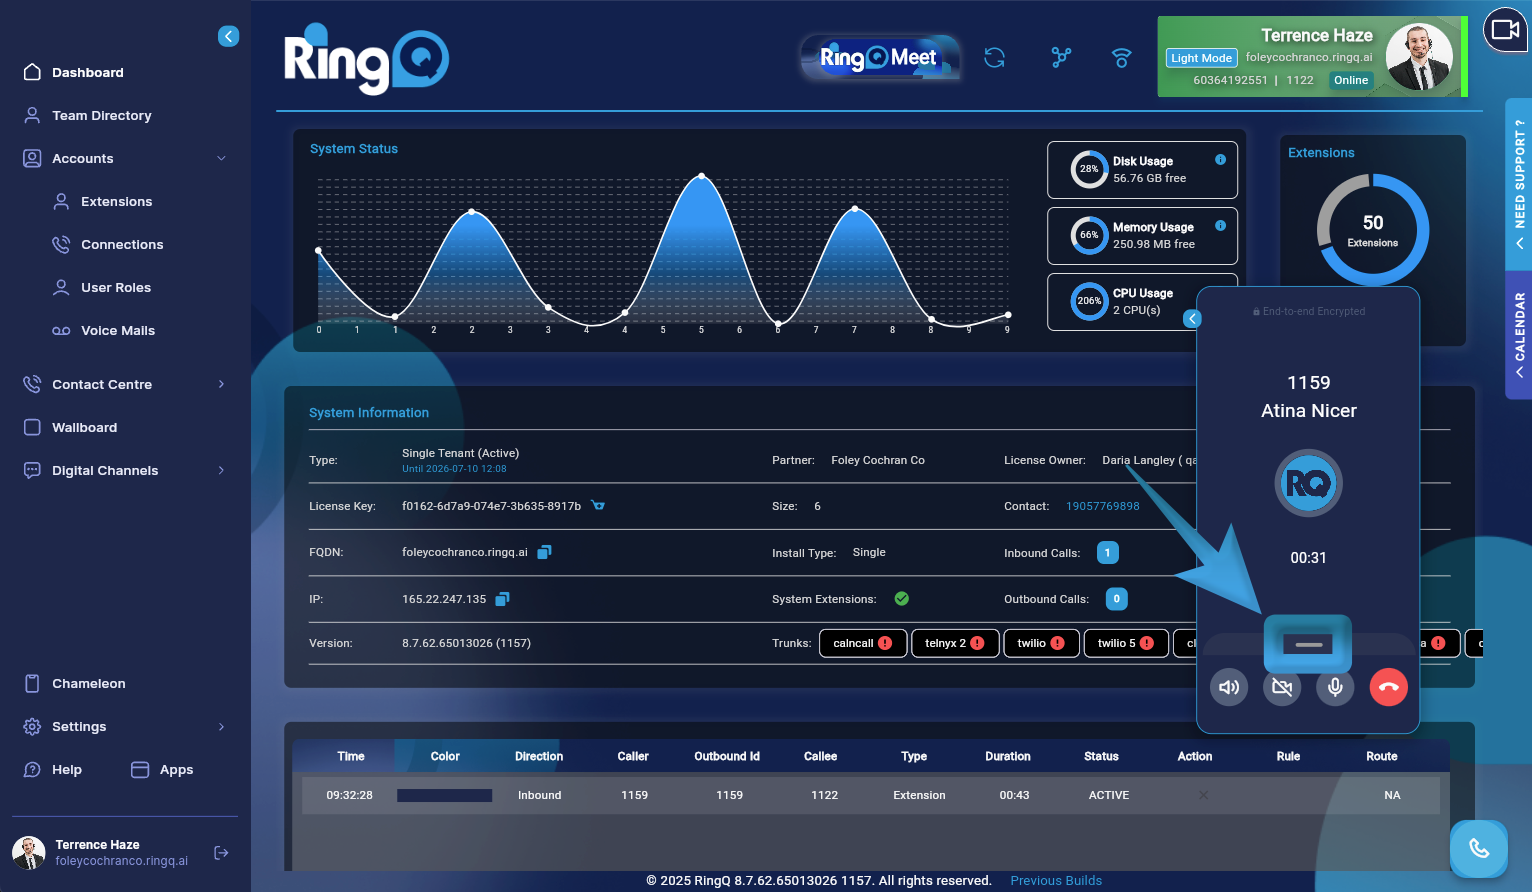
1. During an active call open the call handling options. 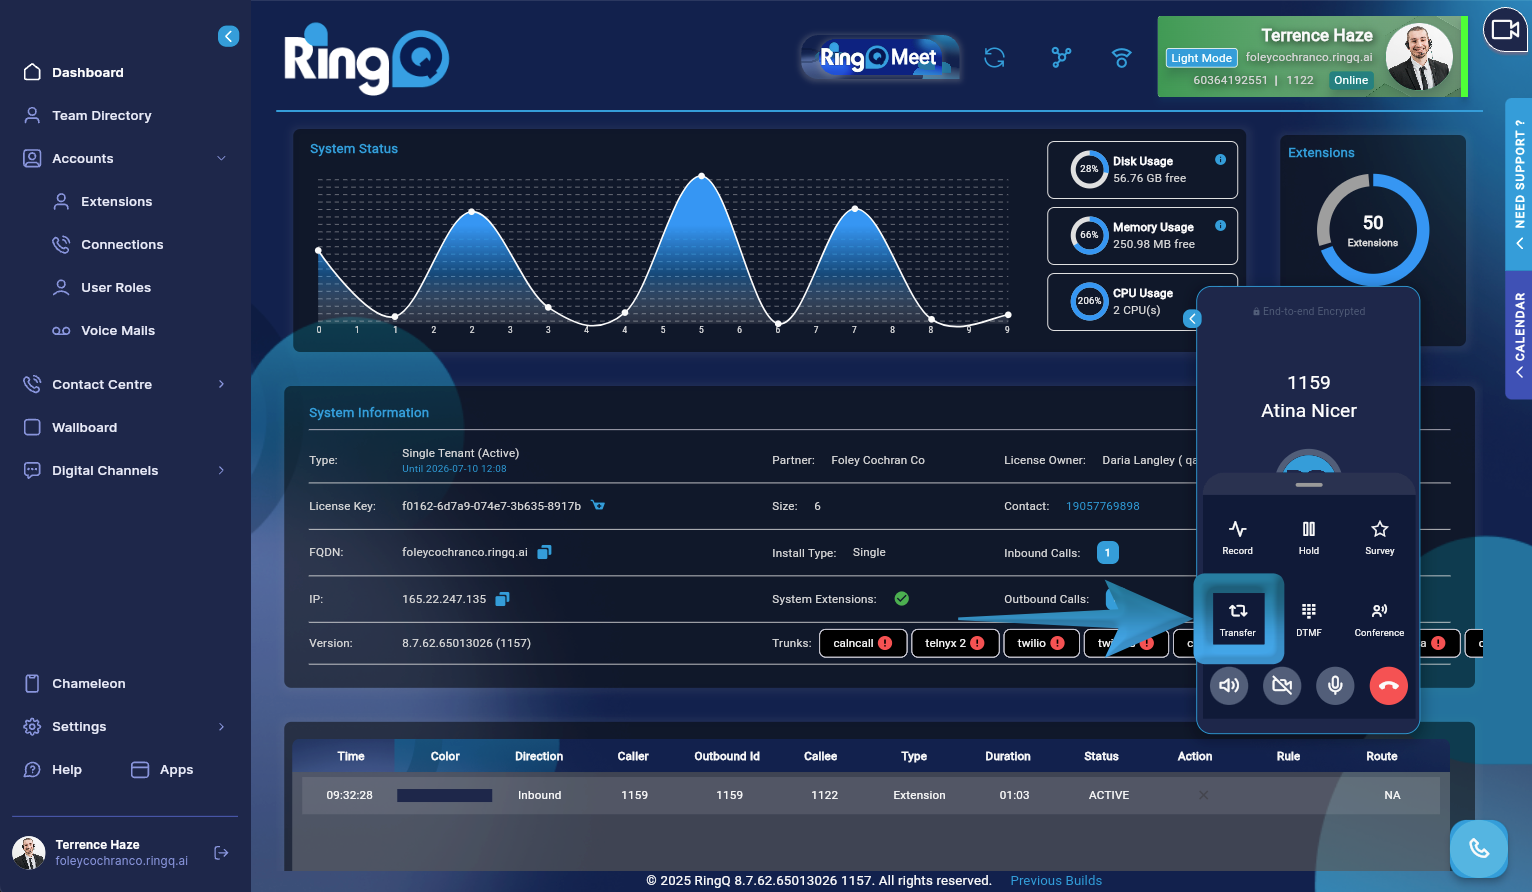
2. Click on the Transfer button to view the transfer options.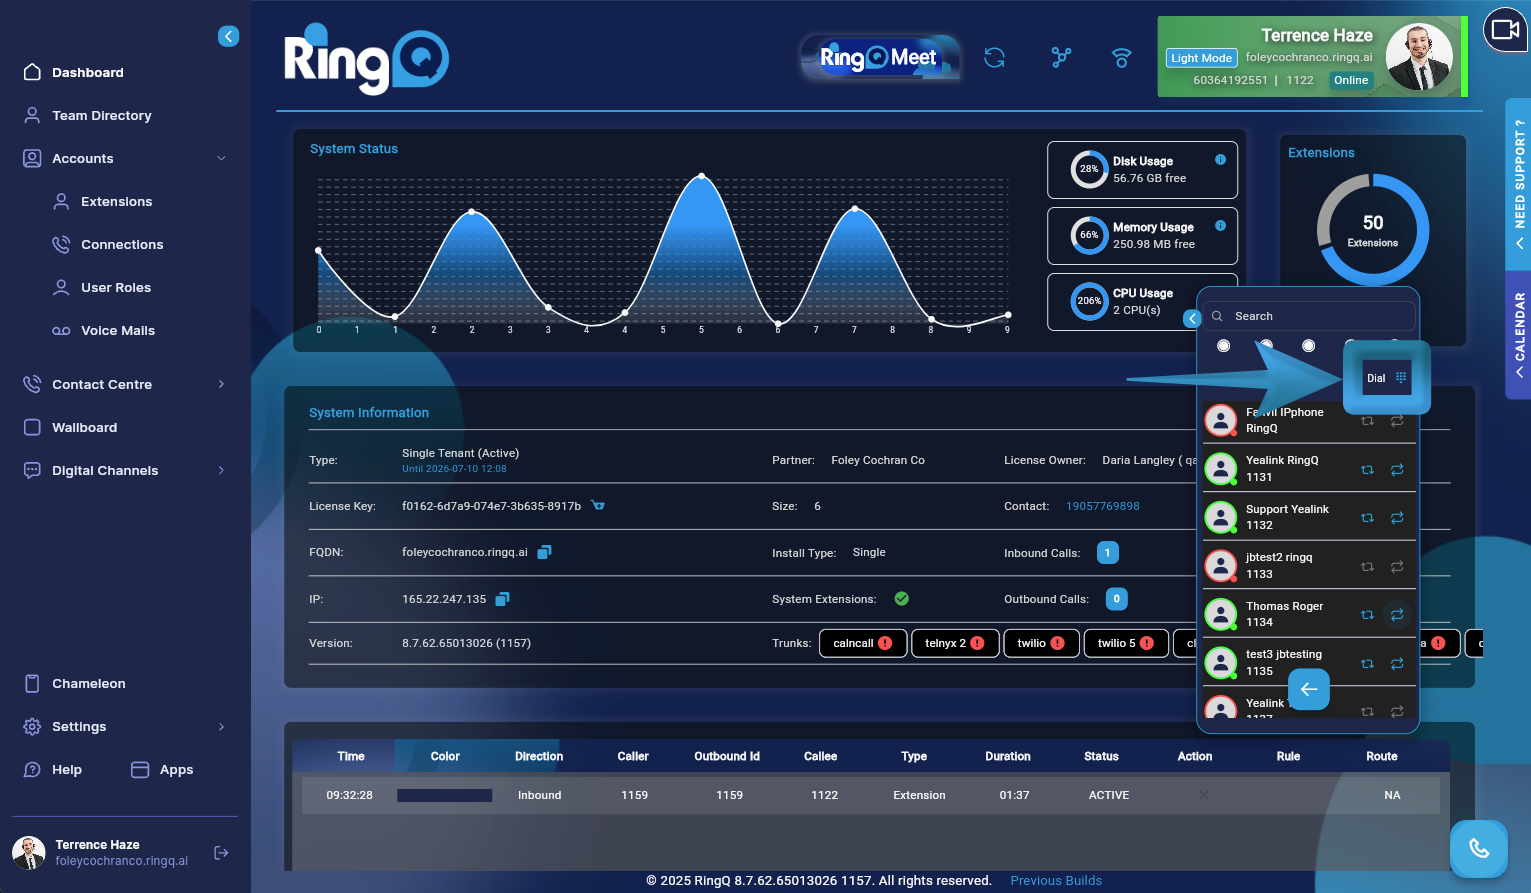
3. Enter the name or extension number of the person you want to transfer the call to in the search bar or click on “Dial” and dial their number manually. Alternatively, you can scroll through the list of extensions and select the extension to transfer the call to. Click on “Attended Transfer”.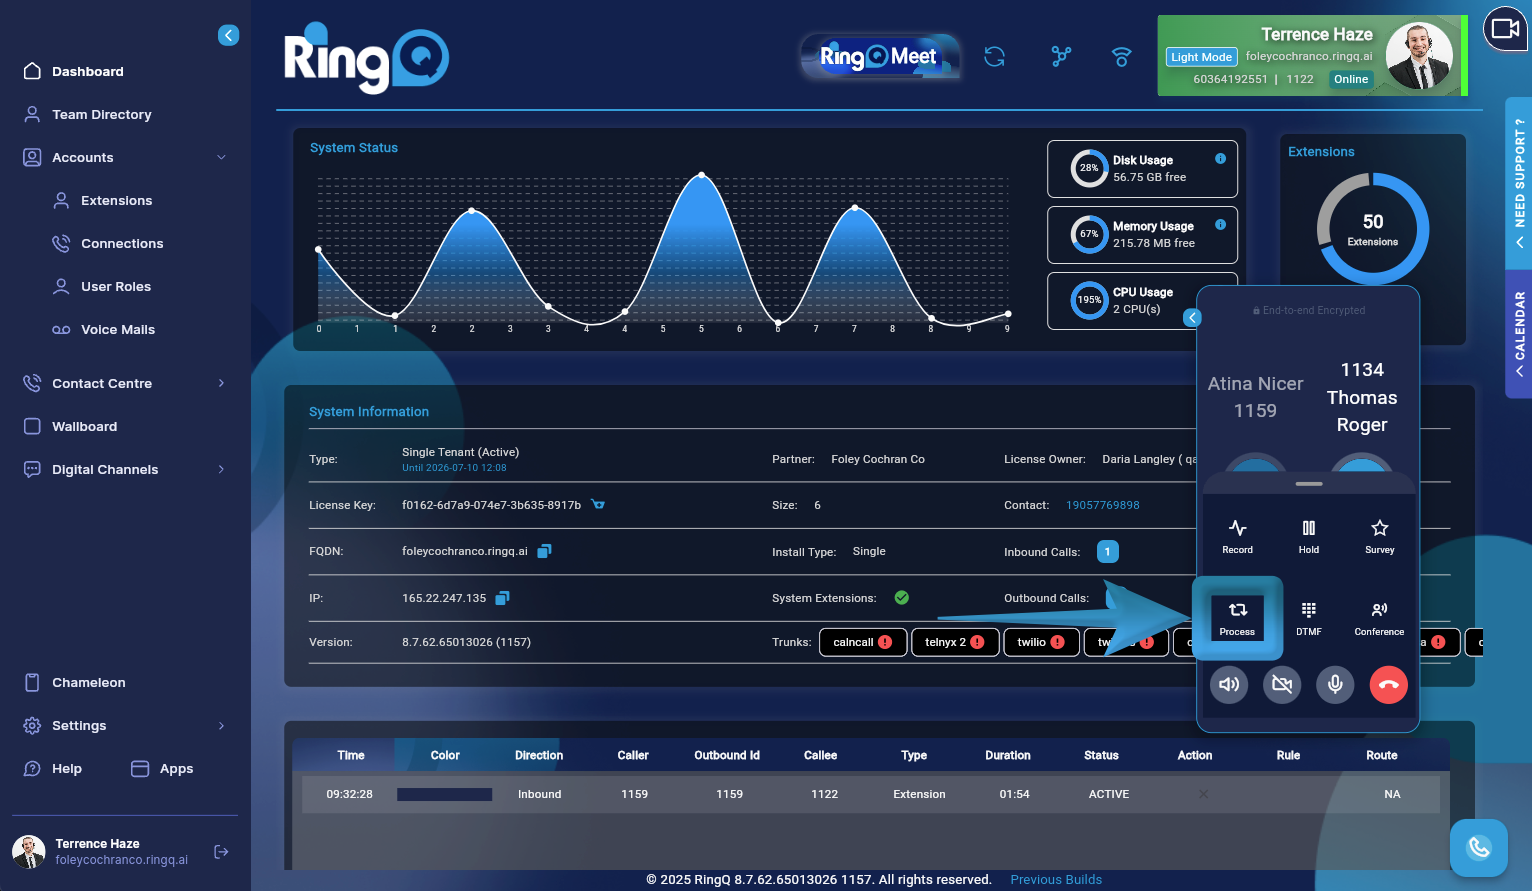
4. Click the Process button.
5. Announce the call to the recipient and once confirmed, hang up to complete the transfer.
Blind Transfer
A blind transfer is when you transfer a call to someone without announcing it to the person before.
1. Follow steps 1 and 2 above.
2. Enter the name or extension number of the person you want to transfer the call to in the search bar or click on “Dial” and dial their number manually. Alternatively, you can scroll through the list of extensions and select the extension to transfer the call to. Click on “Blind Transfer”.
3. The call is transferred and you can hang up.